V. Dimov, M.D., Clinical Assistant Professor of Medicine, Cleveland Clinic Lerner College of Medicine of Case Western Reserve University, Cleveland, Ohio; B. Altaqi, M.D., Assistant Clinical Professor of Medicine, University of Louisville, Kentucky
See the slide show or click on the images below for step-by-step instructions. A free PDA version of this procedure guide is available from MeisterMed, iSilo reader for PDA is required to view the images.
Indications
Venous access is needed for intravenous fluids or antibiotics and a peripheral site is unavailable or not suitable
Central venous pressure measurement
Administration of certain chemotherapeutic drugs or total parenteral nutrition (TPN)
For hemodialysis or plasmapheresis
Contraindications
Uncooperative patient
Uncorrected bleeding diathesis
Skin infection over the puncture site
Distortion of anatomic landmarks from any reason
Pneumothorax or hemothorax on the contralateral side
Relative contraindications
Positive end-expiratory pressure (PEEP) mechanical ventilation
Only one functioning lung
Procedure Step-by-Step
Explain the procedure to the patient and obtain a written informed consent, if possible. Explain the risks, benefits and alternatives (RBA).
Get to know the equipment in the standard central line placement kit. We will use the terms central line and triple lumen catheter (TLC) interchangeably in this article.
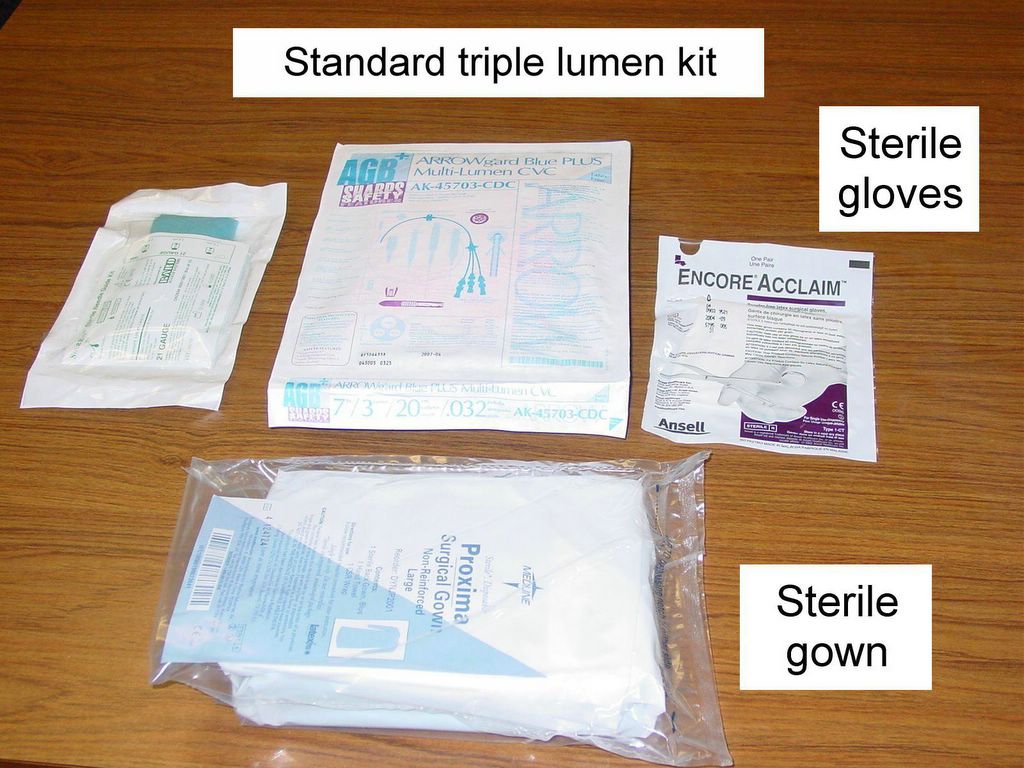
Fig. 1. Equipment needed for TLC.


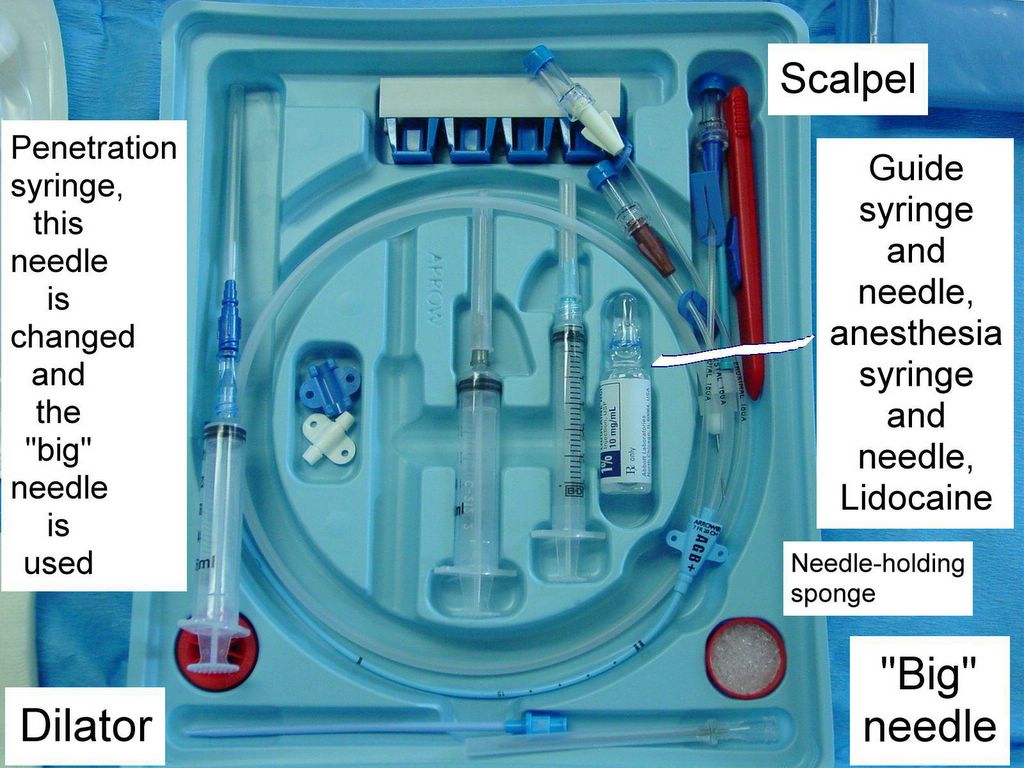
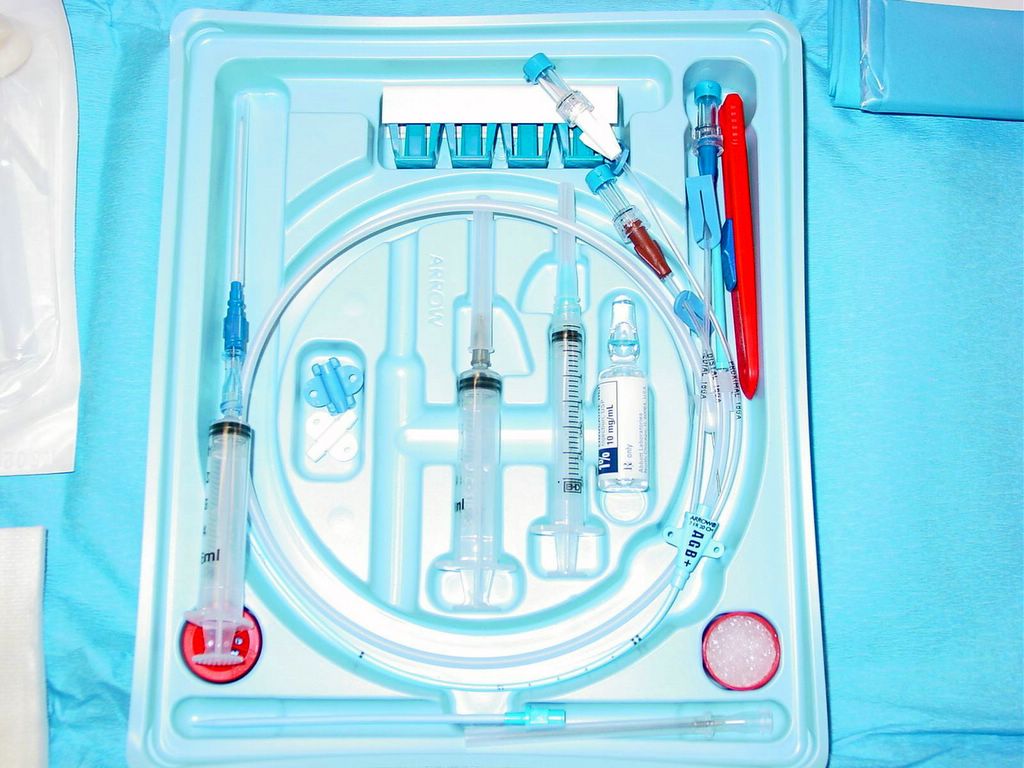
Fig. 2, 3, 4, 5. Open the standard kit and inspect the content. You have to know what each part of the kit is used for.
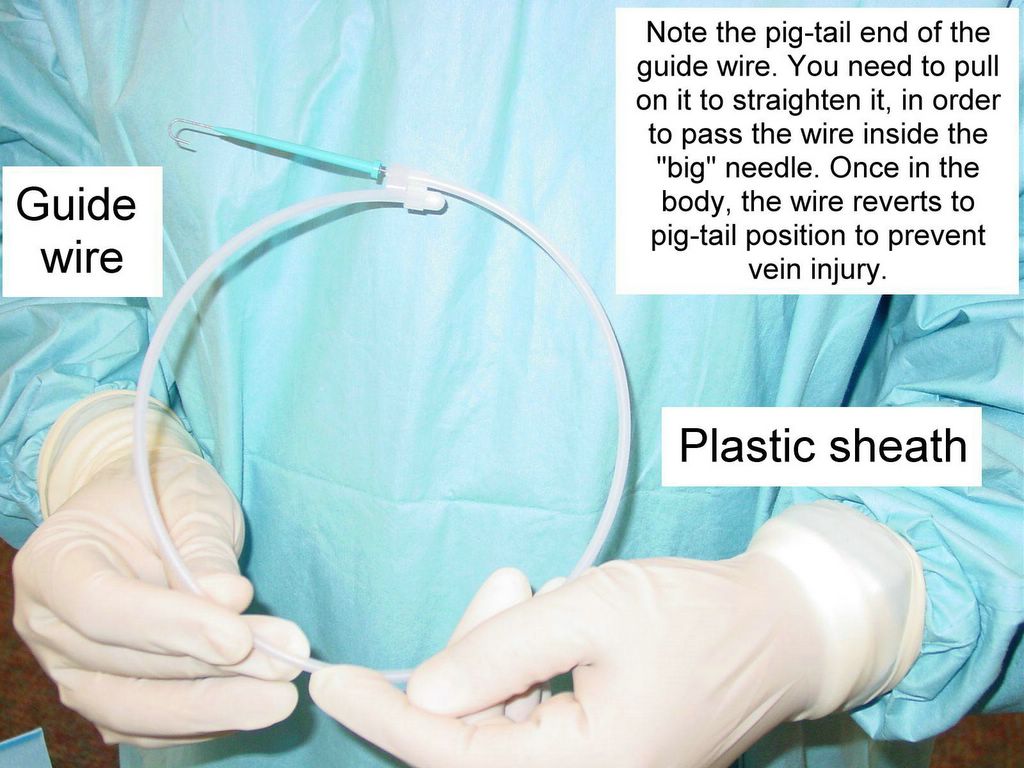
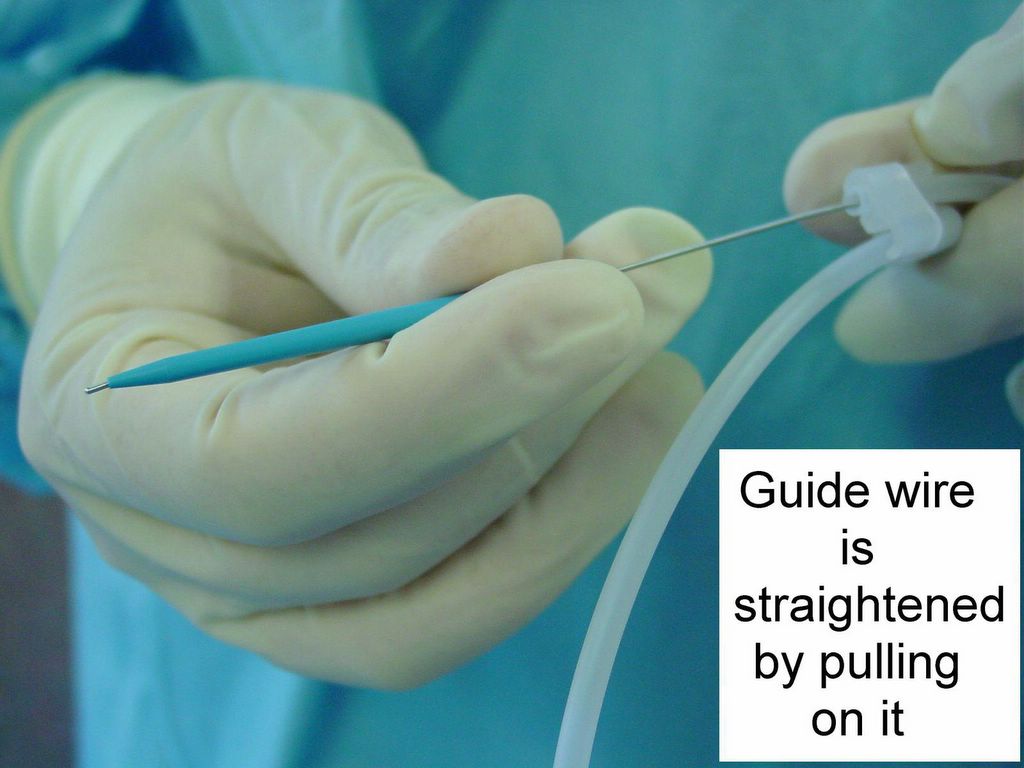
Fig. 6, 7. Take a look at the guide wire.

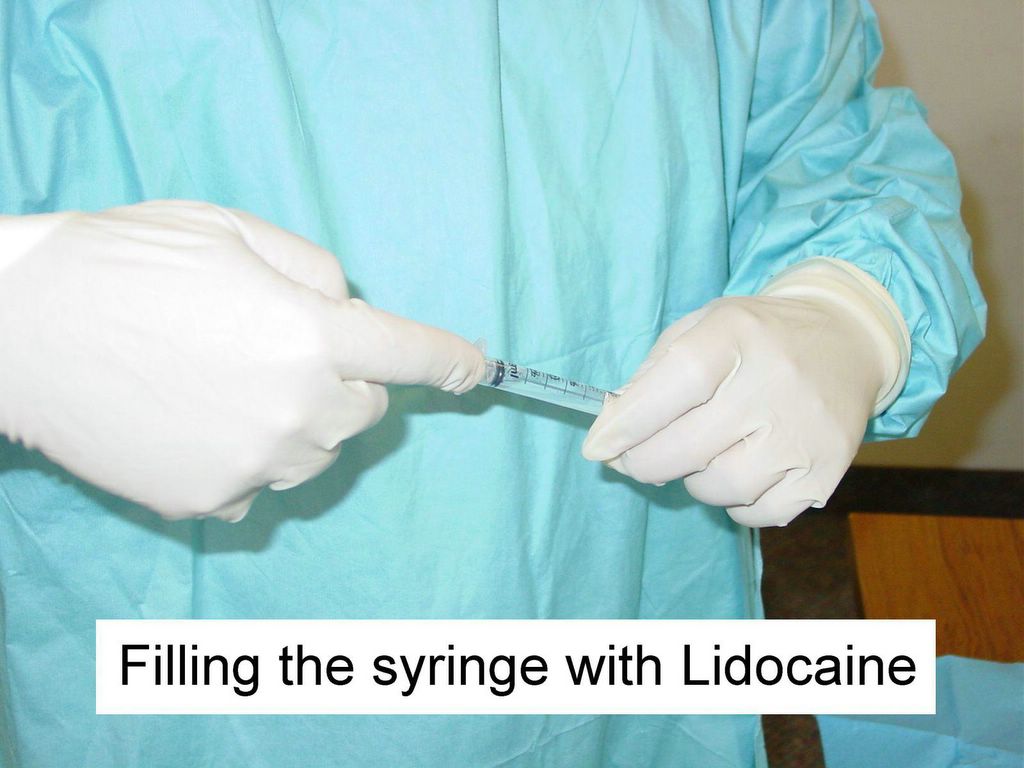
Fig. 8, 9. Lidocaine is used for local anesthesia.
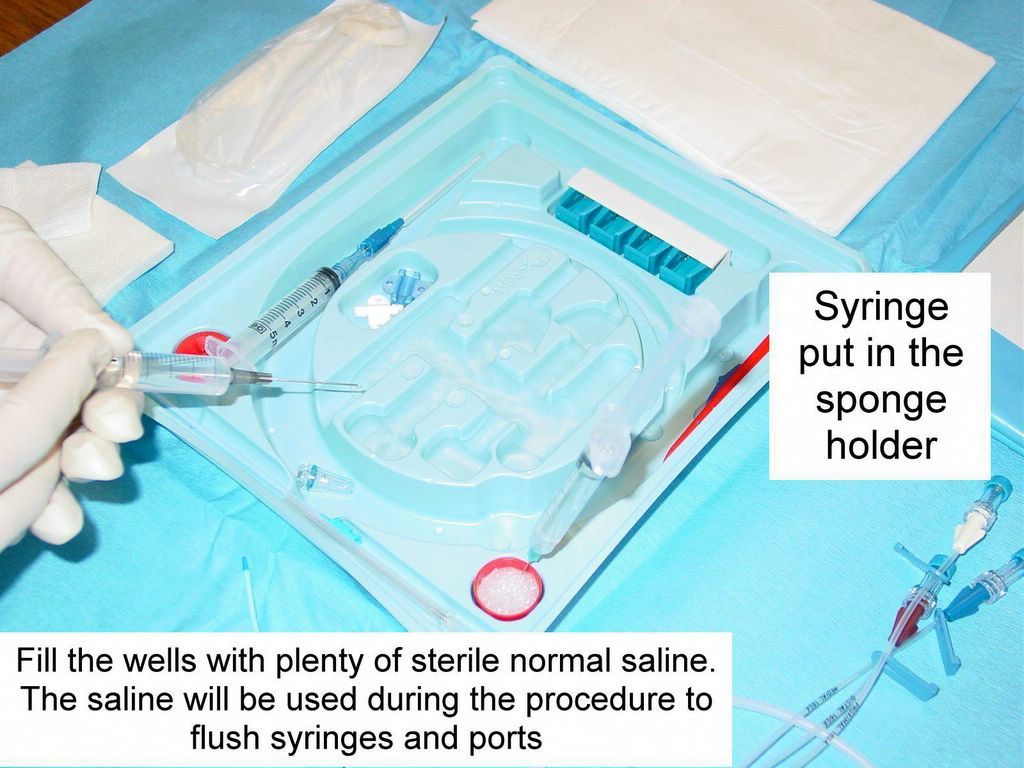


Fig. 10, 11, 12, 13. Fill the wells of the kit with normal saline and flush the TLC.
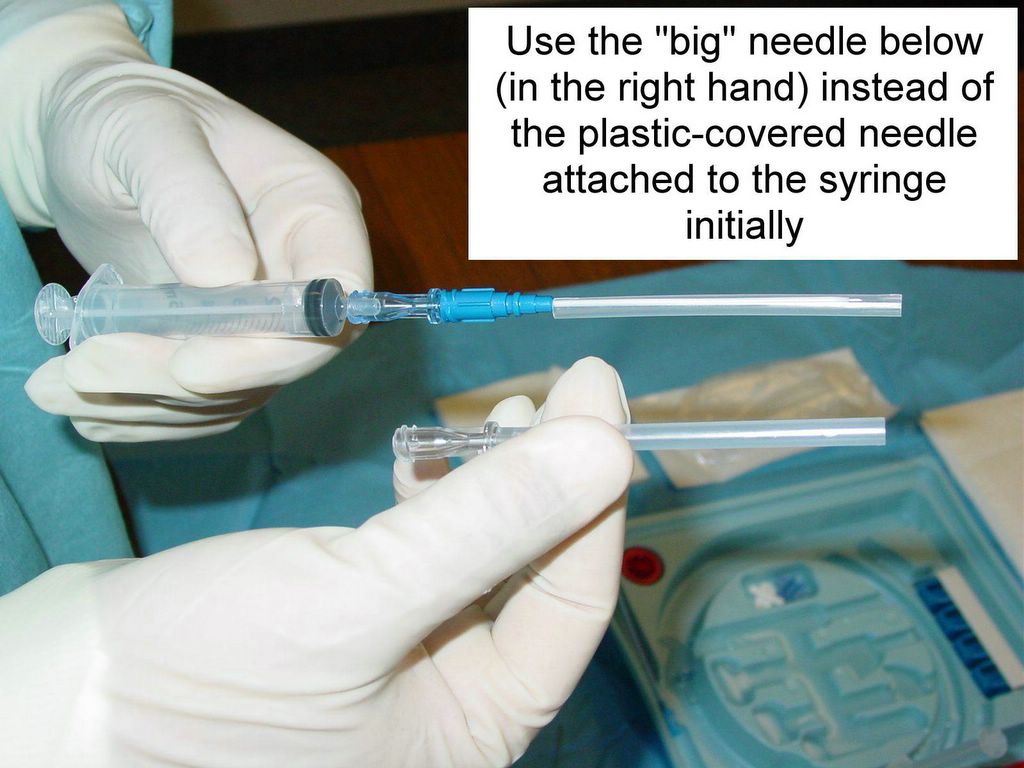


Fig. 14, 15, 16, 17, 18. Check the needles and syringes (three of each).


Fig. 19, 20. Inspect the patient, check the anatomical landmarks.

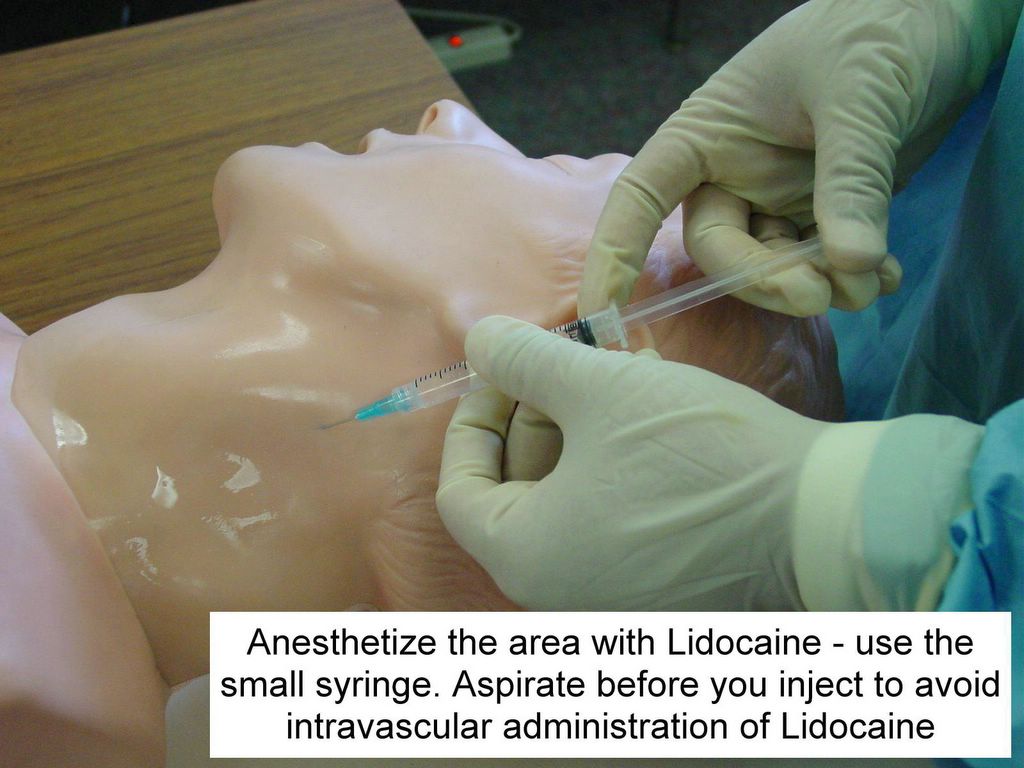

Fig. 21, 22, 23. Disinfect the skin and apply the local anesthesia.
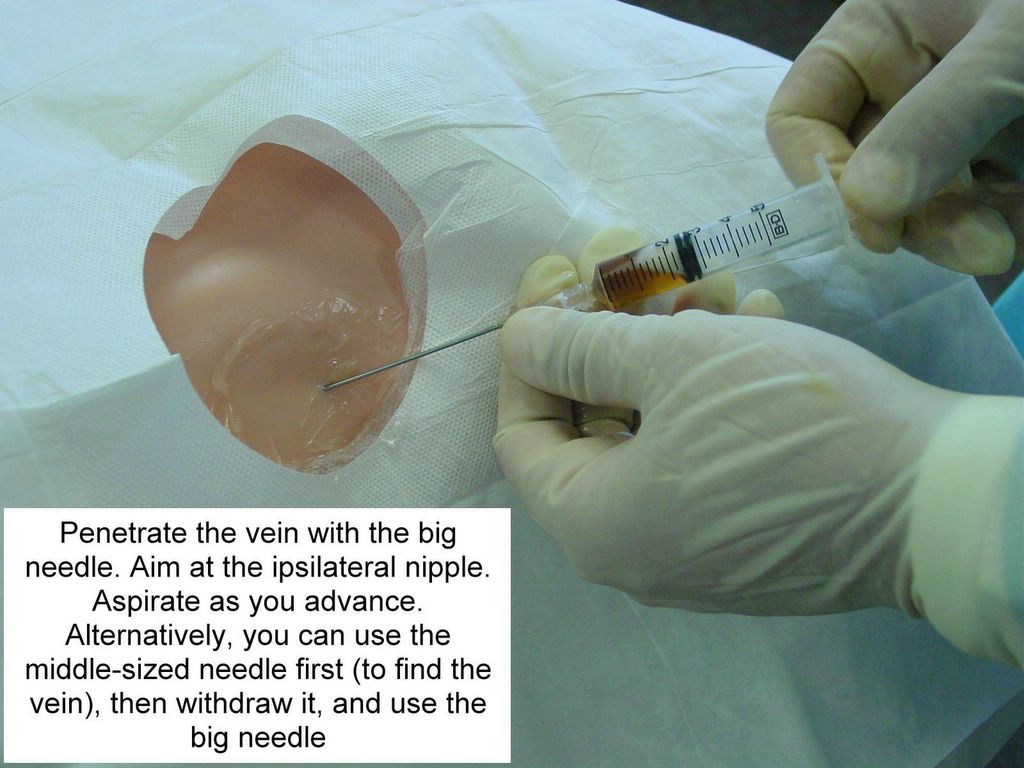
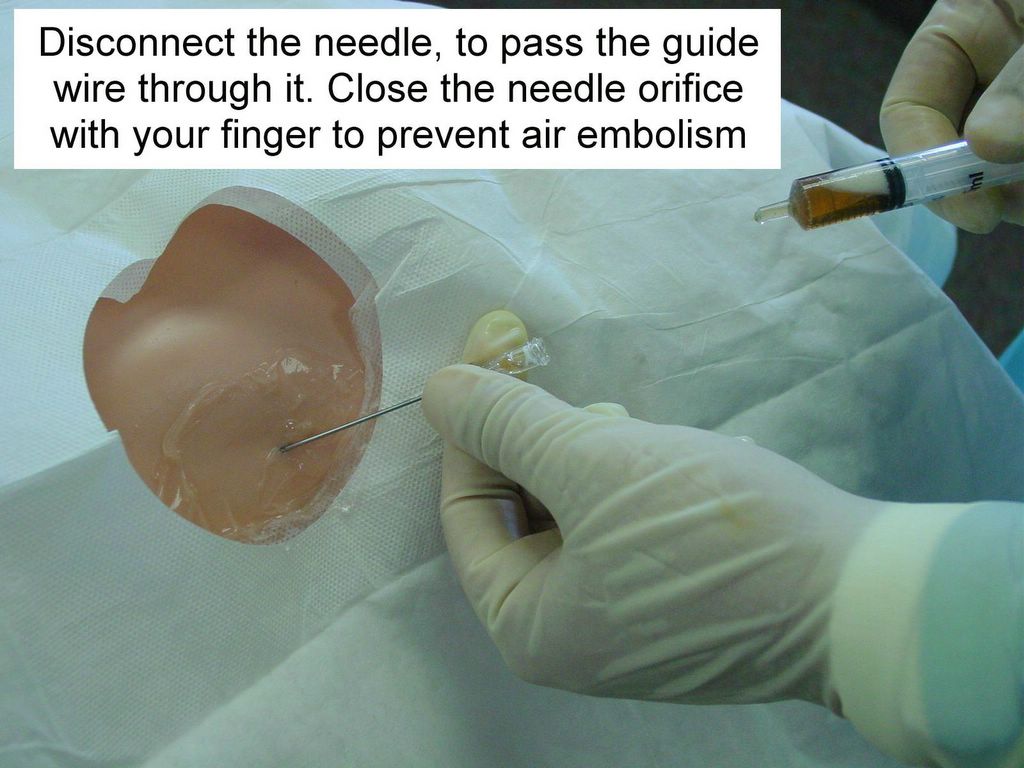
Fig. 24, 25. Start the "real thing" - look for the vein with the big needle (strategy one), or with the smaller guide needle first (strategy two).

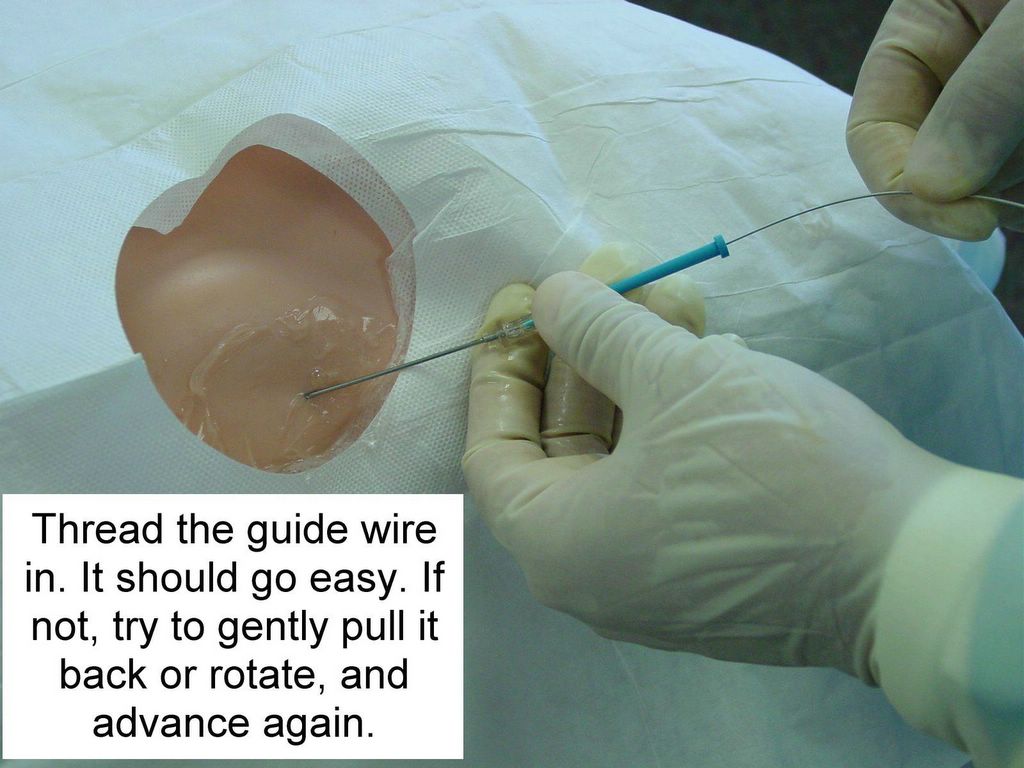

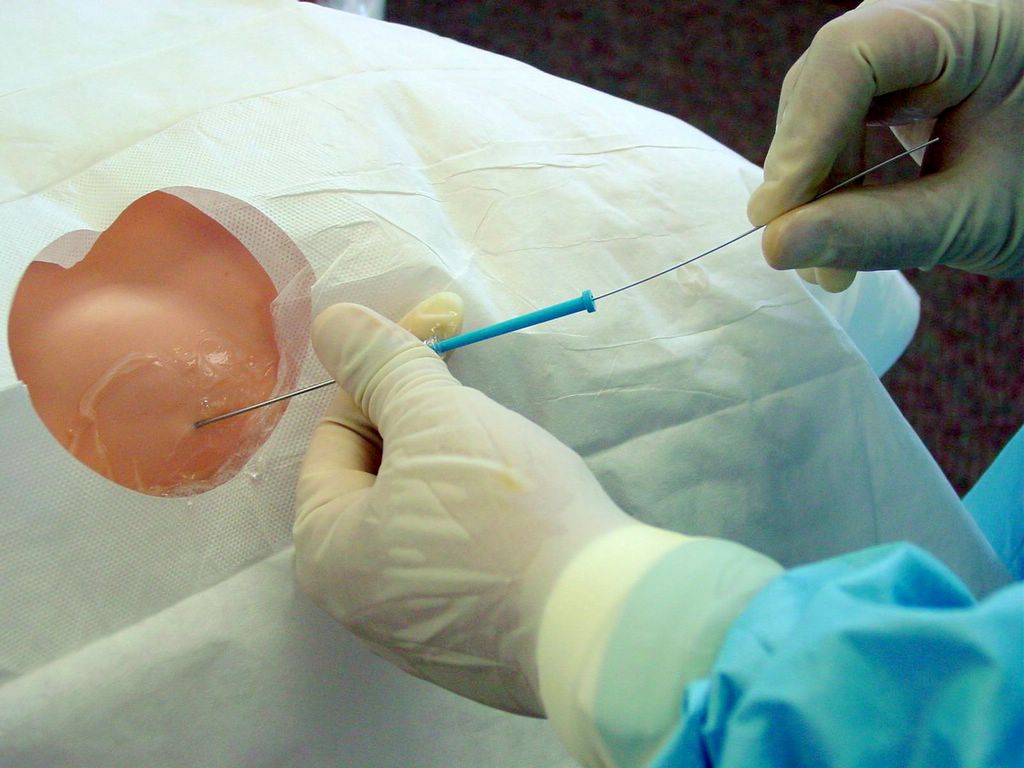

Fig. 26, 27, 28, 29, 30. Thread in the guide wire.

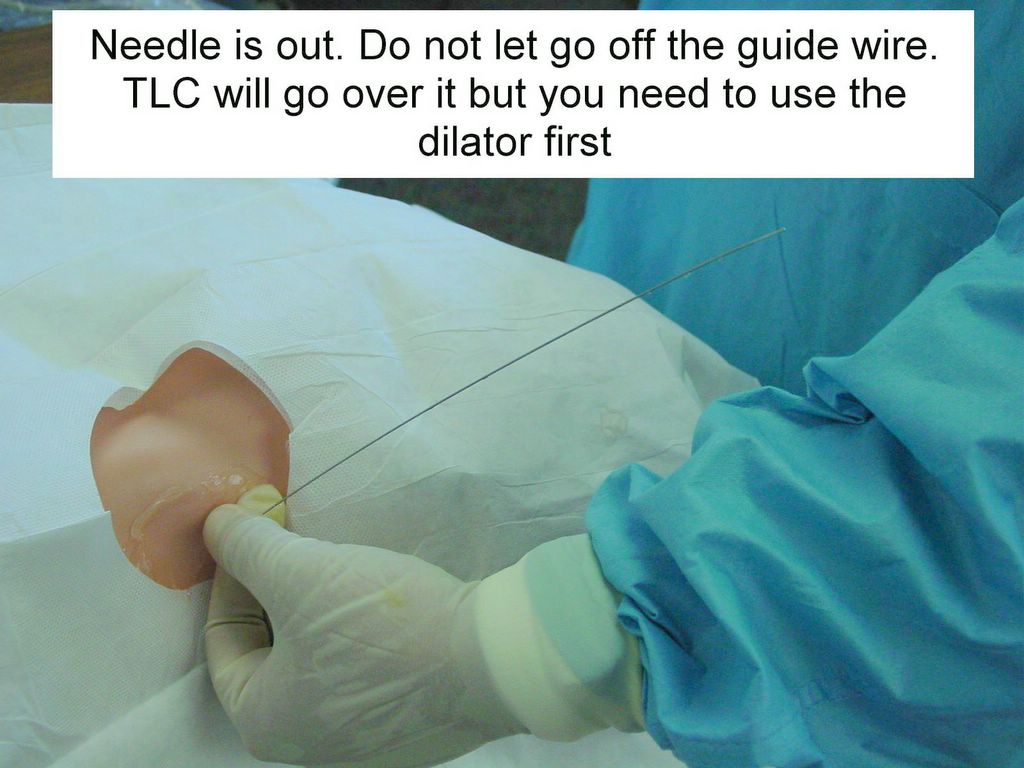
Fig. 31, 32. Pass the dilator over the guide wire.

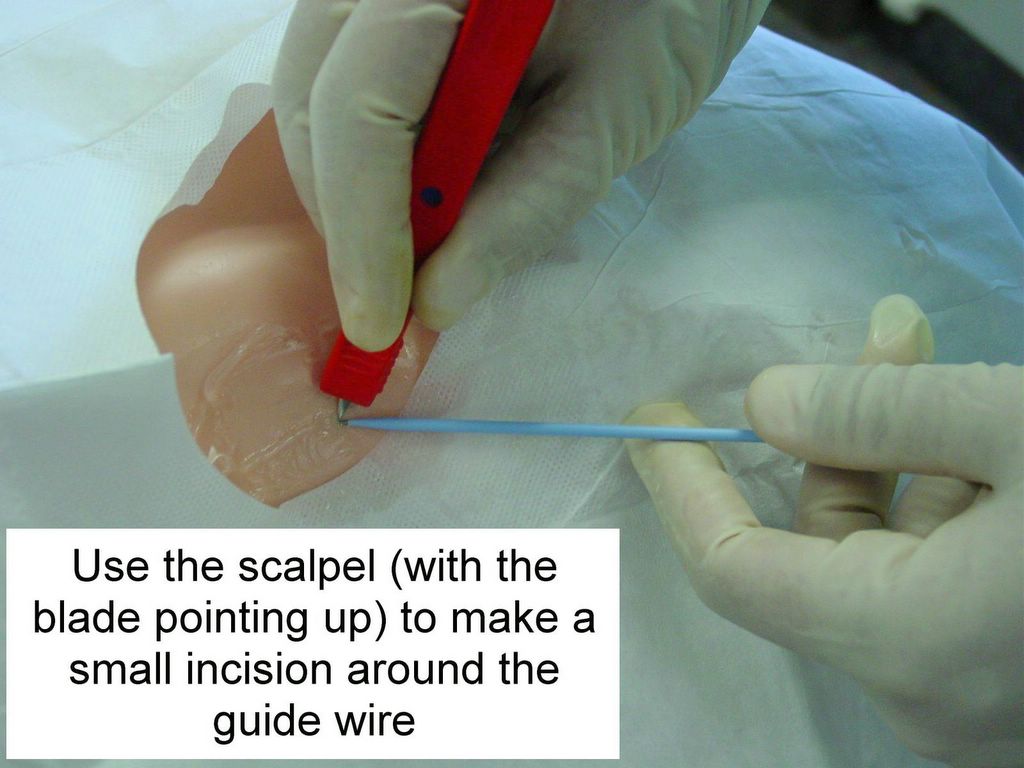
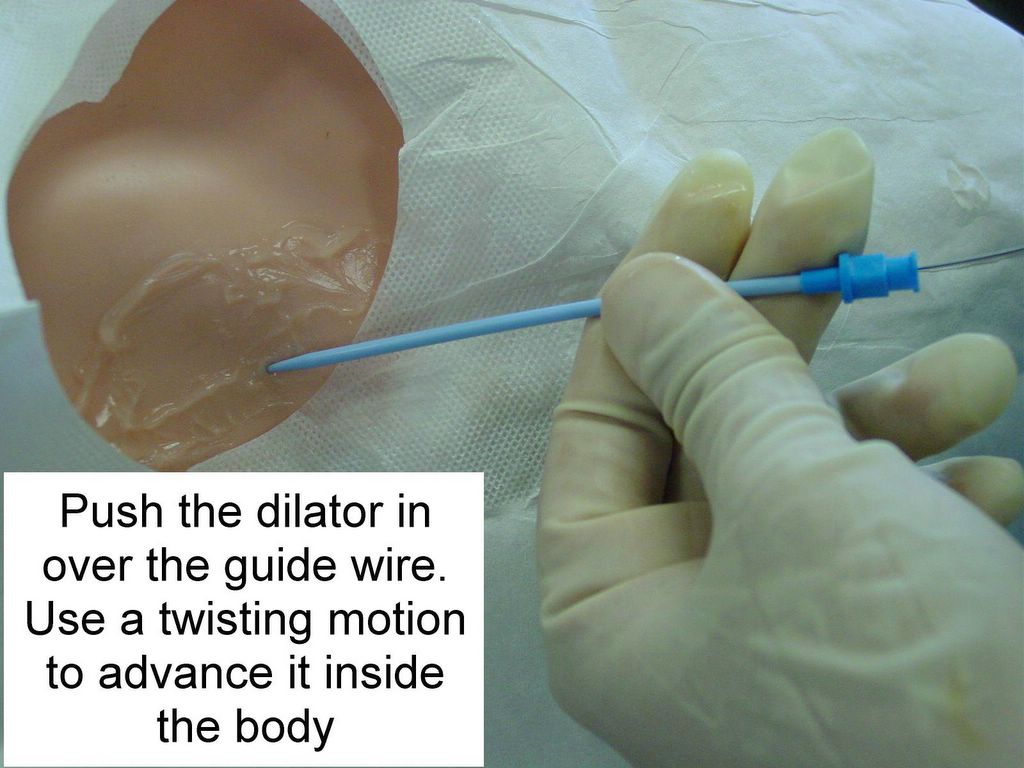
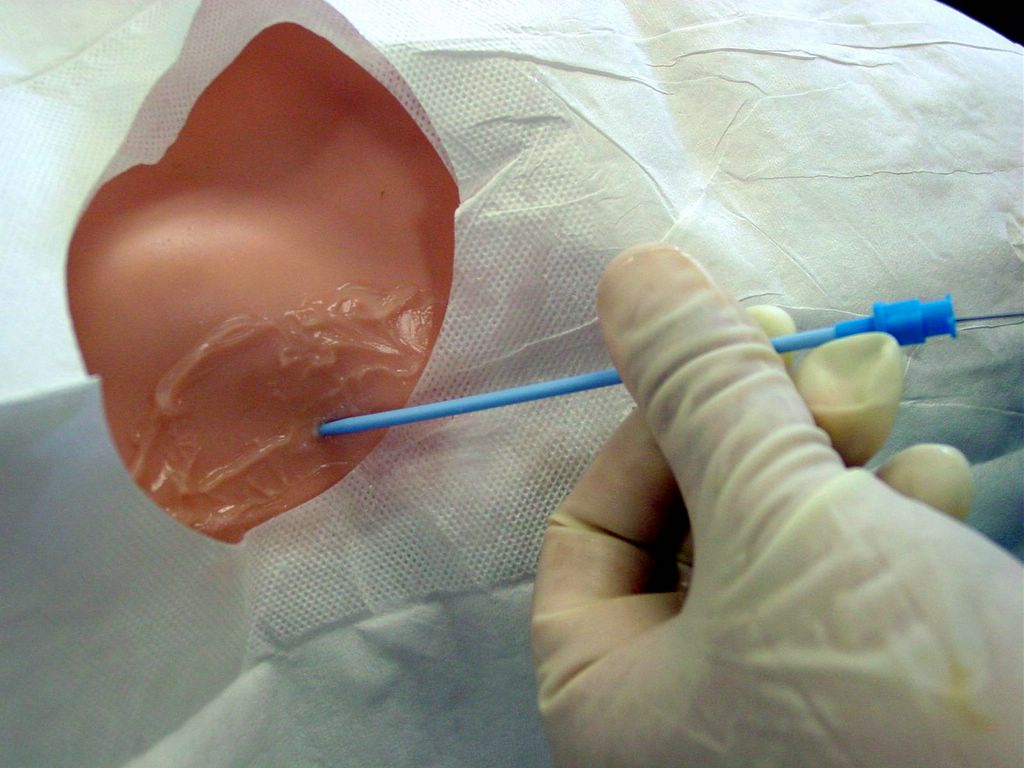
Fig. 33, 34, 35, 36
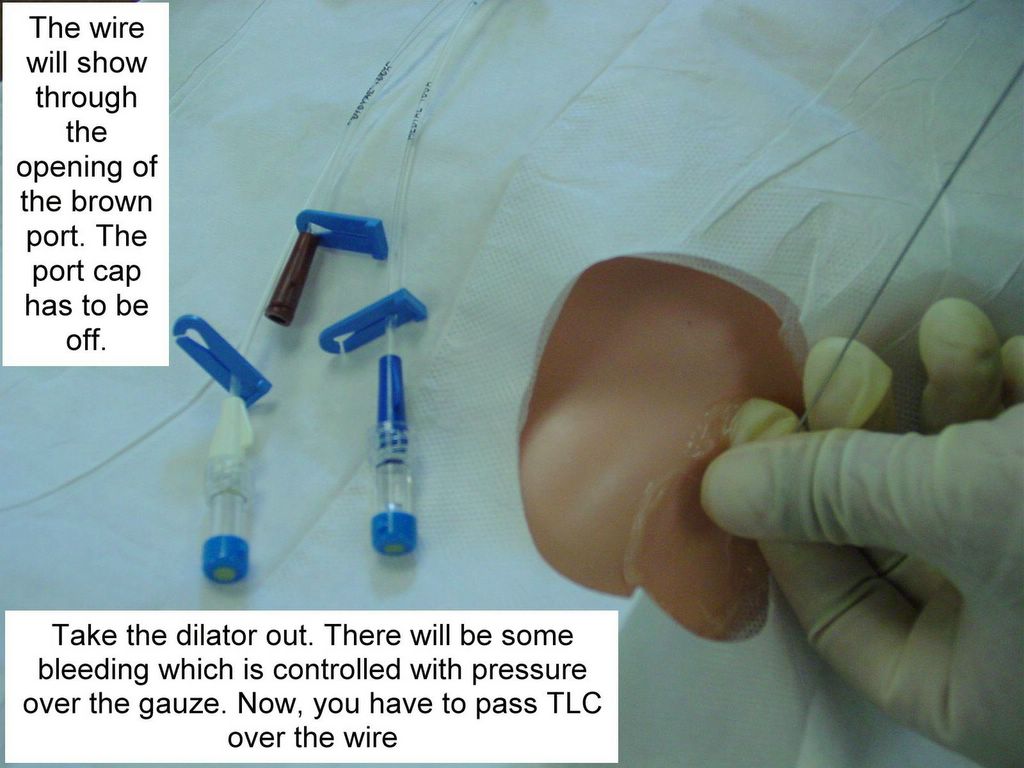


Fig. 37, 38, 39, 40. Pass the TLC over the guide wire.


Fig. 41, 42, 43
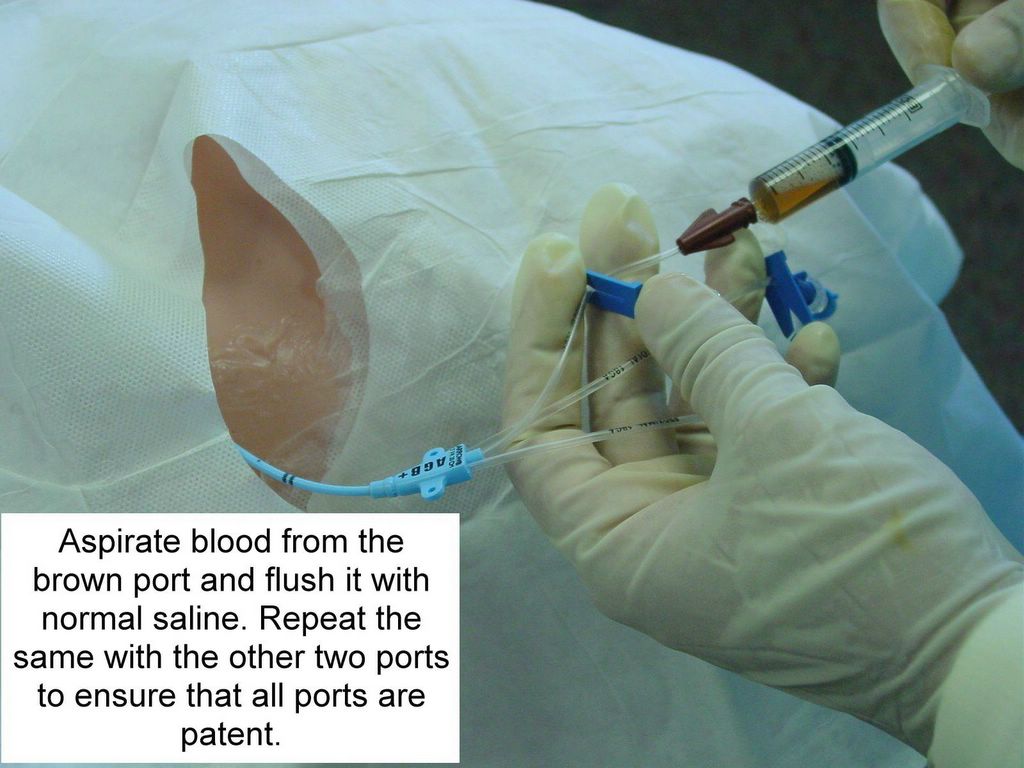
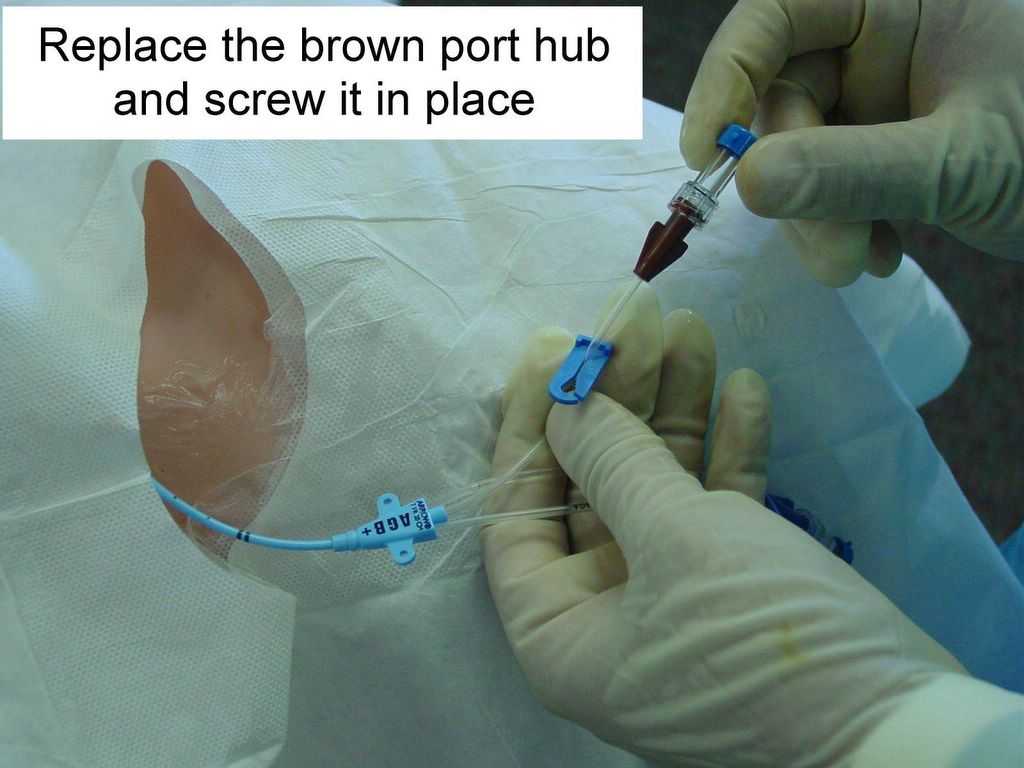
Fig. 44, 45. Flush the TLC to make sure that all 3 ports are patent.
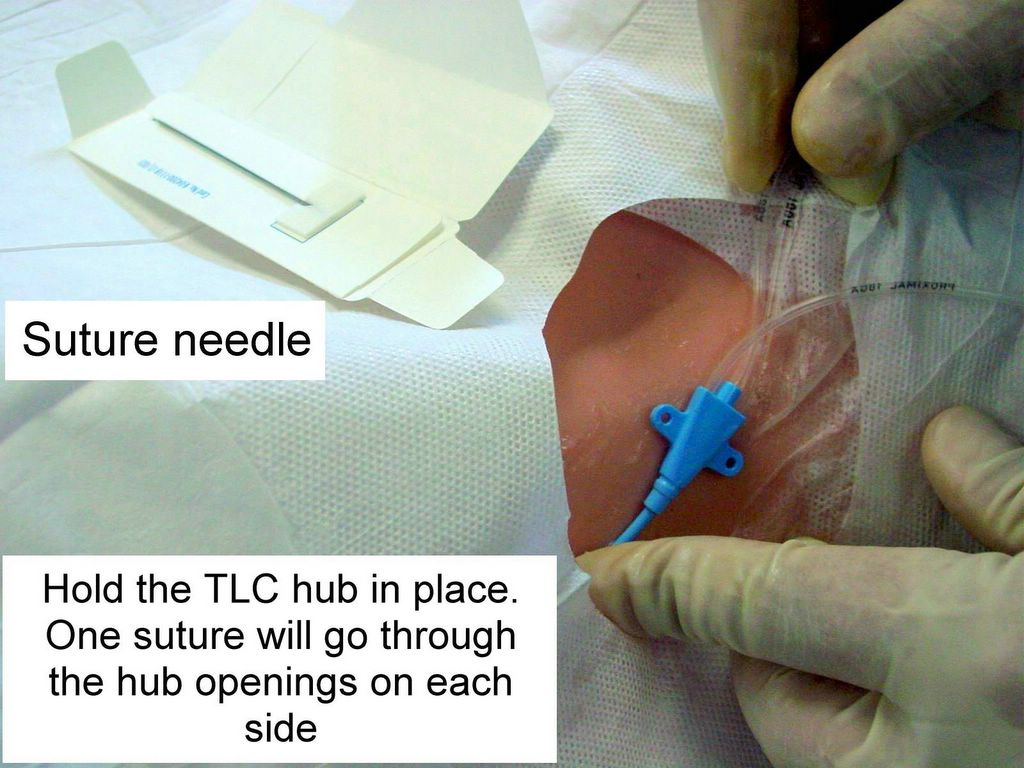
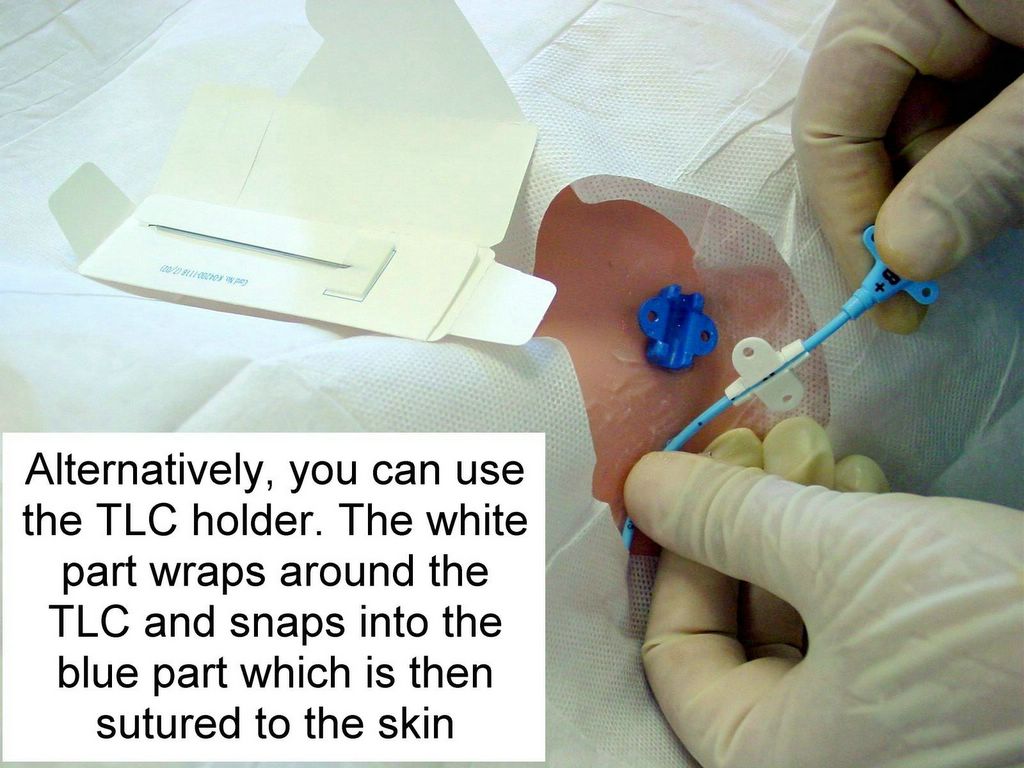

Fig. 46, 47, 48. Suture the TLC in place.
Do not forget to put the needles in the sharp objects collector box. Order a CXR to rule out a pneumothorax and write a procedure note.
Complications
Pneumothroax
Hemothorax
Arrhythmias
Air embolism
Introduction of infection
Write a procedure note which documents the following:
Patient consent
Indications for the procedure
Relevant labs, e.g INR/PTT, platelet count
Procedure technique, sterile prep, anesthetic, amount of fluid obtained, character of fluid, estimated blood loss
Any complications
Tests ordered
References
Central Line Placement (with and without ultrasound guidance). A Chapter in MeisterMed's Procedure Series for PDA. V. Dimov, B. Altaqi, 2/20/2007.
Internal Jugular Vein Cannulation. The UCSF Hospitalist Handbook.
Central Venous Catheterization. NEJM, 2007 (paid subscription required).
Central Venous Access. eMedicine, July 29, 2005.
VenousAccess.com Slides
Central Line Placement. Blueprints Clinical Procedures by Laurie L Marbas, Erin Case. Blackwell Publishing, access via Google Book Search.
Procedures. University at Buffalo.
Central Venous Catheterization: Concise Definitive Review. Medscape, Critical Care Medicine, 05/16/2007 (free registration required).
Placement of a Femoral Venous Catheter. NEJM, 06/2008.
Further reading
NEJM Videos in Clinical Medicine. These are high-quality professional videos but they require a subscription to NEJM:
Central Venous Catheterization - IJ vein
Central Venous Catheterization - Subclavian Vein
Central Line
Invasive procedures. BMJ 12/2005.
Lightning Strikes Twice. Scalpel or Sword? 11/2007.
Becoming a Rural Doctor, Part 5: Procedures for the Rural Doctor. Rural Doctoring, 2008.
Disclaimer
The material and/or content on this web site are for informational purposes only. Users of the web site should not act upon any information received from this site without seeking professional consultation. Click here for more information.
Published: 05/11/2005
Updated: 06/25/2008


Excellent presentation with appropriate slides/photos
ReplyDeleteHowever,it has not been made clear whether the guide wire has to be removed or left in place!
Thanks for the fine procedure presentation. Keep it up.
Very nice. Just another small detail: while applying the choroprep to the patient's neck the operators other hand was resting on the patient's forehead. Touching any area not prepped or draped violates sterile technique.
ReplyDeleteThanks for the otherwise great walkthrough.
Thanks for great procedure.But didnt get fully information about How to remove or switch off this procedure & what to do while switching off.Please tell that also.
ReplyDeleteThis was the clearest presentation of all the slides and videos about JV catheterization I have watched. Thank you.
ReplyDeletea nice presentation but didn't mention any thing about femoral or subclavian catheterisation and their complications.plese add those also.
ReplyDeleteperfect.....
ReplyDeletenice presentation.explanation very clearly about cvl insertion step by step.interested when was read the topic and get more picture.thank you....
ReplyDeletewhat a precise step by step explaination of the correct procedure....
ReplyDeleteSurprised you don't recommend the use of ultrasound to guide placement, considering the recent announcement by medicare regarding HAC that now includes iatrogenic pneumothorax during venous catheterization.
ReplyDeleteSuch a detailed demonstration! It gives me a very clear idea of the procedure. Thanks!
ReplyDeleteIt'd be great if the guide on site of insertion is included =)
nice
ReplyDelete