Showing posts with label Education. Show all posts

Clinical Notes By Organ System

Cardiology
A Systematic Approach to Reading an EKG by Using Two Mnemonics
Perioperative Evaluation for Noncardiac Surgery
How to evaluate for JVD?
What is a J-point elevation?

Pulmonology and Critical Care
Central Line Placement - Procedure Guide
Central Line Placement with Ultrasound Guidance - Procedure Guide
Thoracentesis - Procedure Guide
Spiriva and Foradil Inhalers - How to Use them?
ICU What To Do Guide
Procedure Skills and ACLS Refresher
Early Goal-Directed Therapy in Septic Shock

GI
How to confirm a nasogastric tube (NGT) placement? By CXR or KUB?
TPN Calculator - MS Excel file by Dr. Velez
PEG Tube calculator - MS Excel file by Dr. Velez

Nephrology

Endocrinology
Erectile Dysfunction. NEJM, 12/2007.

Hem/Onc

Rheumatology

ID
Empiric Treatment of Common Infections
Steroid dose in septic shock
Pneumonia Protocol and PORT Score

Neurology
Vertigo by Dr. Altaqi - How to differentiate central from peripheral vertigo?

Psychiatry
Which antidepressant to choose among so many?...
Antipsychotics Use - Typical and Atypical Medications
How to do a Pink Slip

Dermatology
Acne Stages and Treatment

Miscellaneous
Different Venous Catheters – What is PICC, Hickman, Quinton, and Port-A-Cath?
Do you order a CXR for Midline placement?
Hyponatremia Work-Up - Notes from Dr.Tahir's lecture
Hyperkalemia and hypokalemia - Dr. Chen
How to treat hypomagnesemia? - Dr. Chen

Treatment Protocols
Early Goal-Directed Therapy in Septic Shock
DVT Diagnosis and Treatment Protocol
Pneumonia Protocol and PORT Score
Drug Withdrawal Protocols

Study Aids for various CWRU clerkships:
5 x 8 index card for tracking your patients' hospital course and more.

Sample SOAP Progress Note


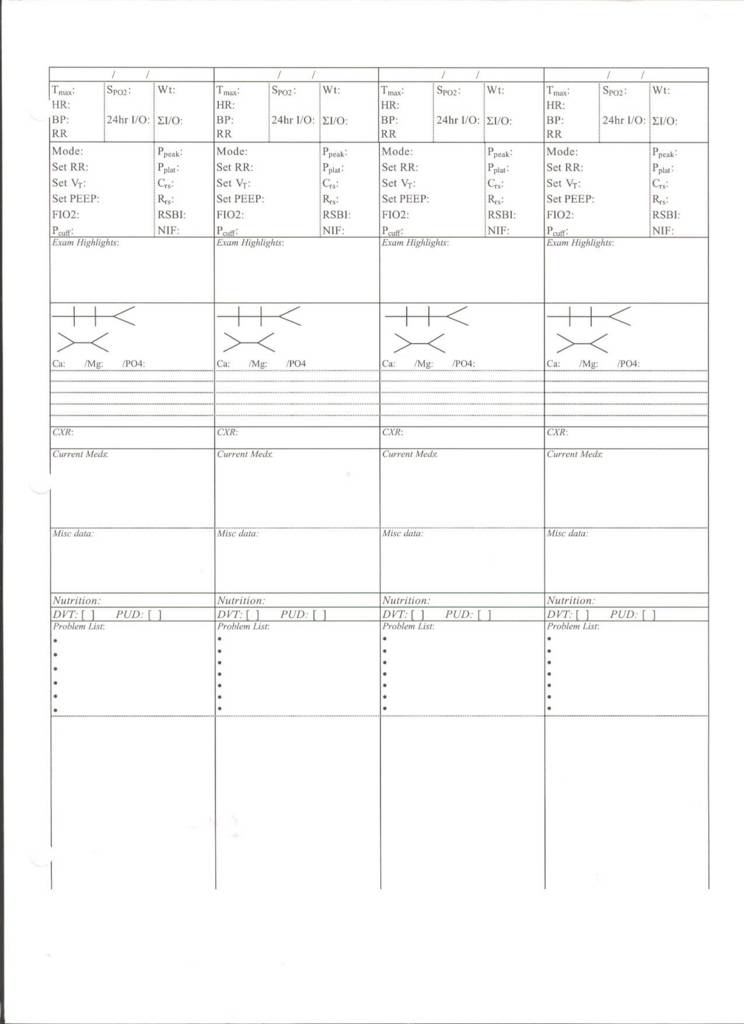
ICU / Floor Patient Tracking Note


Related:
UCSF Hospitalist Handbook
LSUHSC-S Family Medicine Website:
Intern-in-the-Middle-of-the-Night Series - a mini-handbook
Outpatient Management Manual
EMR (Epic) primer: Our Most Expensive Typing Pool. Dr. Wes, 09/2008.

Published: 12/10/2004
Updated: 09/04/2008

Thoracentesis: A Step-by-Step Procedure Guide with Photos

Authors:
V. Dimov, M.D., Clinical Assistant Professor of Medicine, Cleveland Clinic Lerner College of Medicine of Case Western Reserve University, Cleveland, Ohio; B. Altaqi, M.D., Assistant Clinical Professor of Medicine, University of Louisville, Kentucky

See the slide show or click on the images below for step-by-step instructions. A free PDA version of this procedure guide is available from MeisterMed, iSilo reader for PDA is required to view the images.

Indications

Pleural effusion which needs diagnostic work-up
Symptomatic treatment of a large pleural effusion

Contraindications

Uncooperative patient
Uncorrected bleeding diathesis
Chest wall cellulitis at the site of puncture

Relative contraindications

Bullous disease, e.g. emphysema
Positive end-expiratory pressure (PEEP) mechanical ventilation
Only one functioning lung
Small volume of fluid (less than 1 cm thickness on a lateral decubitus film)

Procedure Step-by-Step

Explain the procedure to the patient and obtain a written informed consent, if possible. Explain the risks, benefits and alternatives (RBA). Benefits may include less SOB, obtaining a diagnosis, and risks may include pneumothorax, bleeding, or even death.


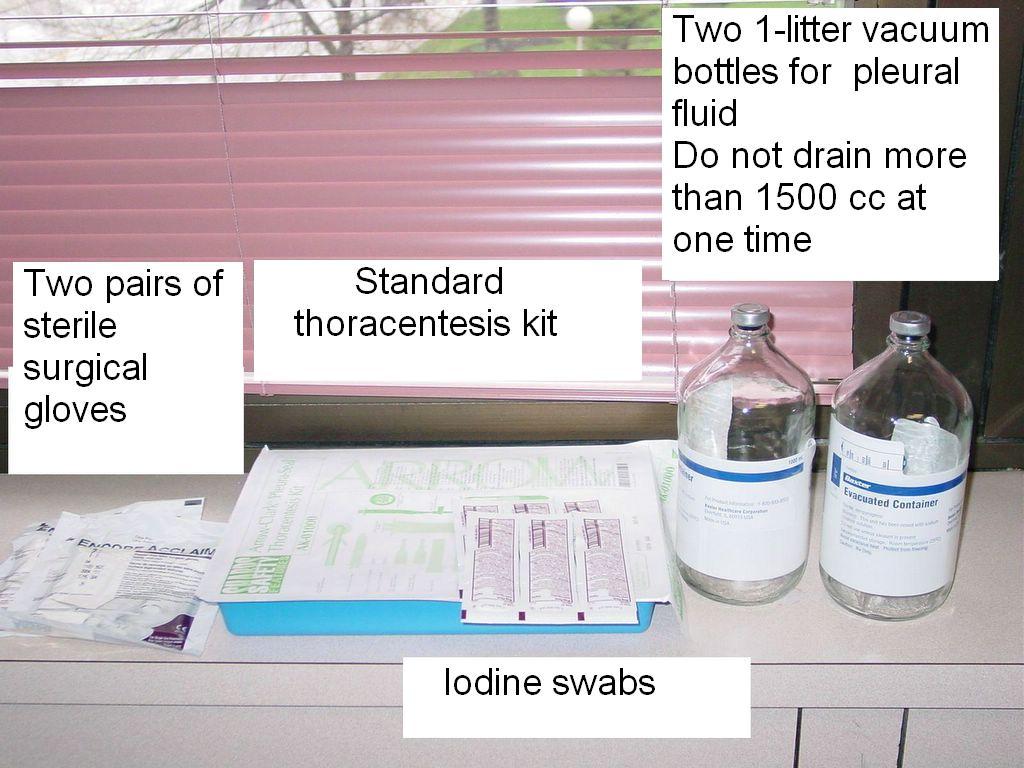
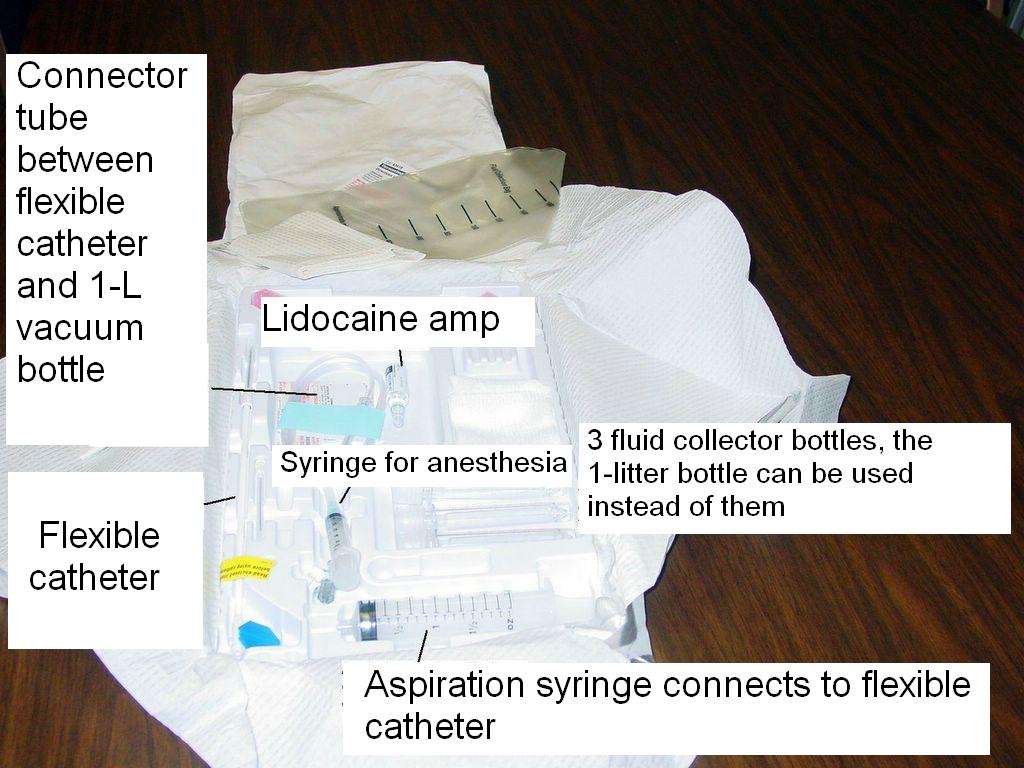
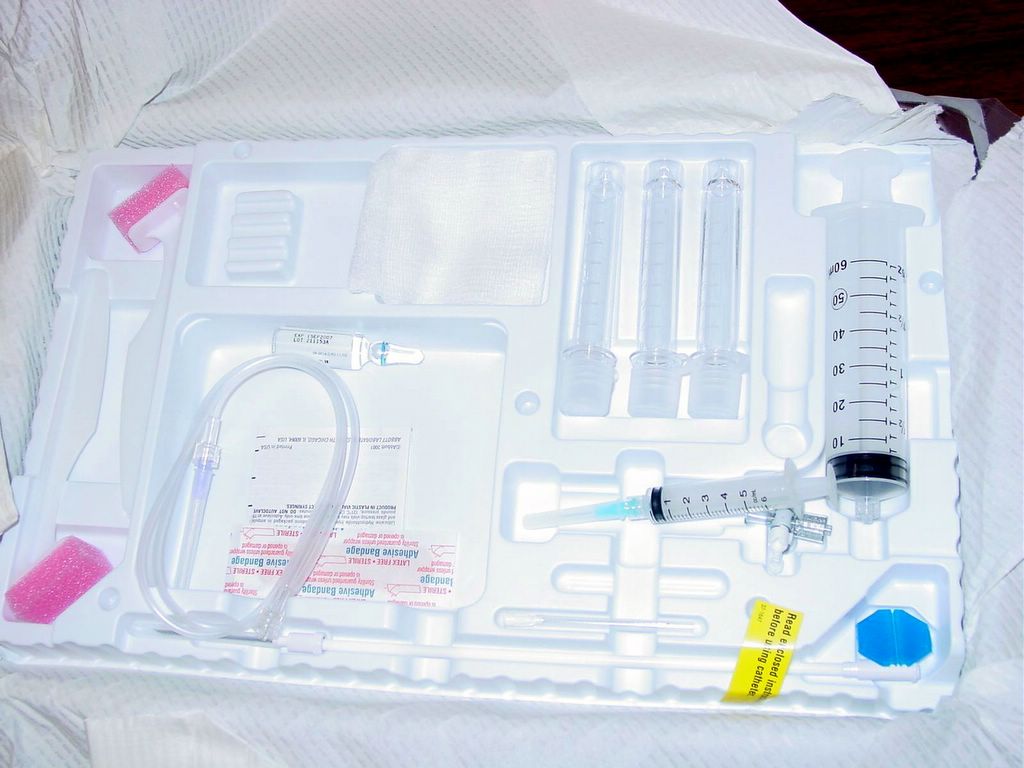
Fig. 1. Get the standard thoracentesis kit. In addition to the kit, you will need two 1-liter vacuum bottles and Bethadine for cleaning the area. Prepare the necessary equipment for the pleural tap.


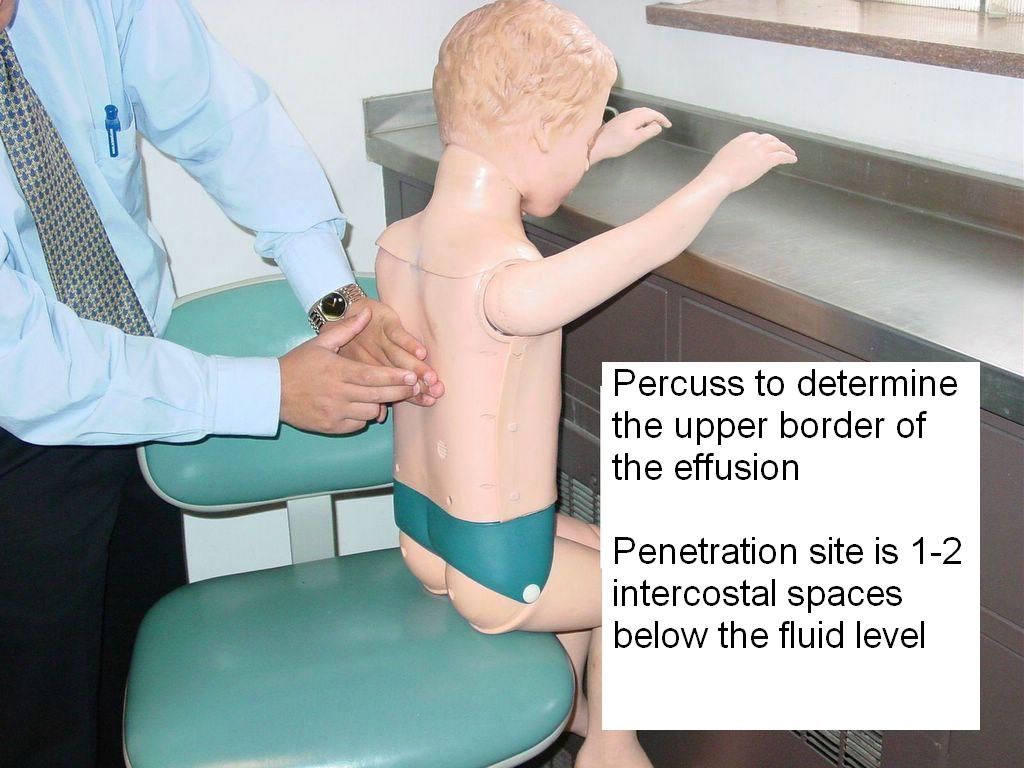
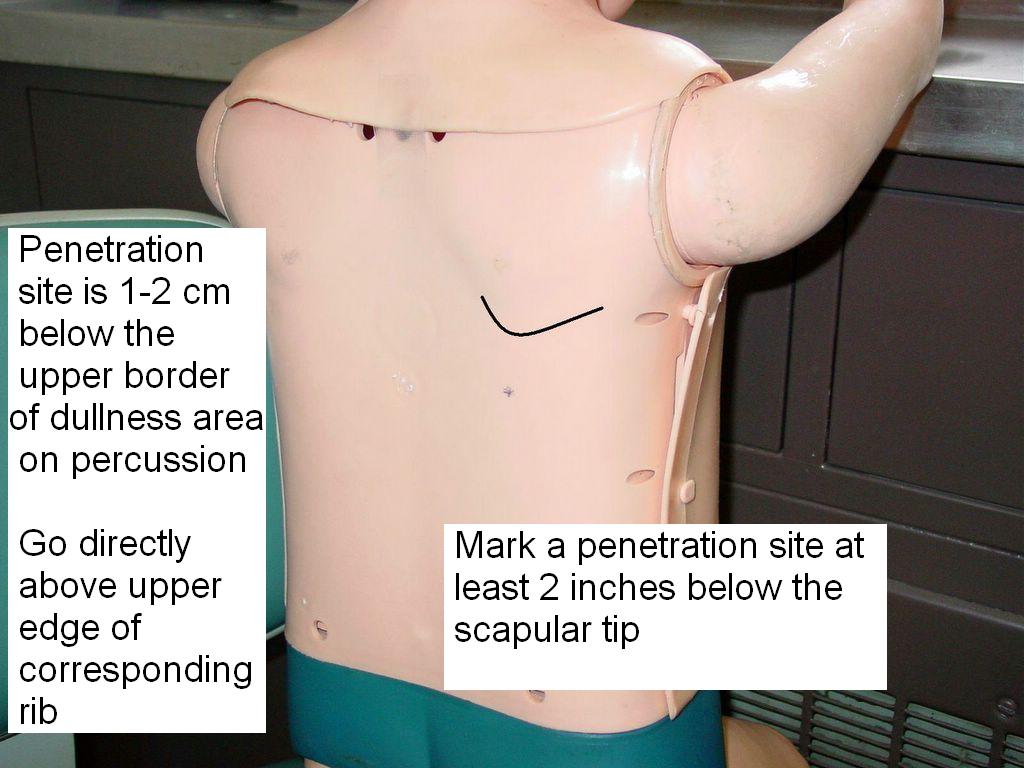
Fig. 2, 3, 4, 5. Find the anatomical landmarks before you perform the thoracentesis.


Fig. 6, 7. Clean the area with iodine.


Fig. 8, 9. Open the kit and make sure that you know which tube and needle are used for.


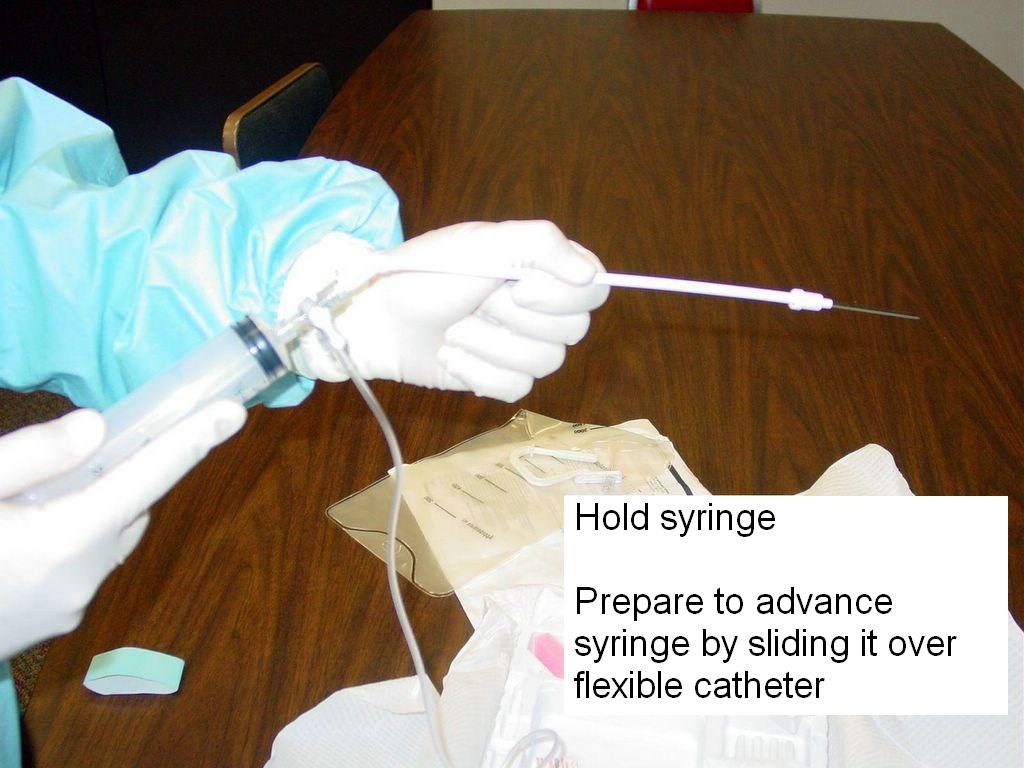
Fig. 10, 11. Practice sliding the flexible catheter.


Fig. 12, 13. Prepare for local anesthesia.


Fig. 14, 15. Prepare the area.


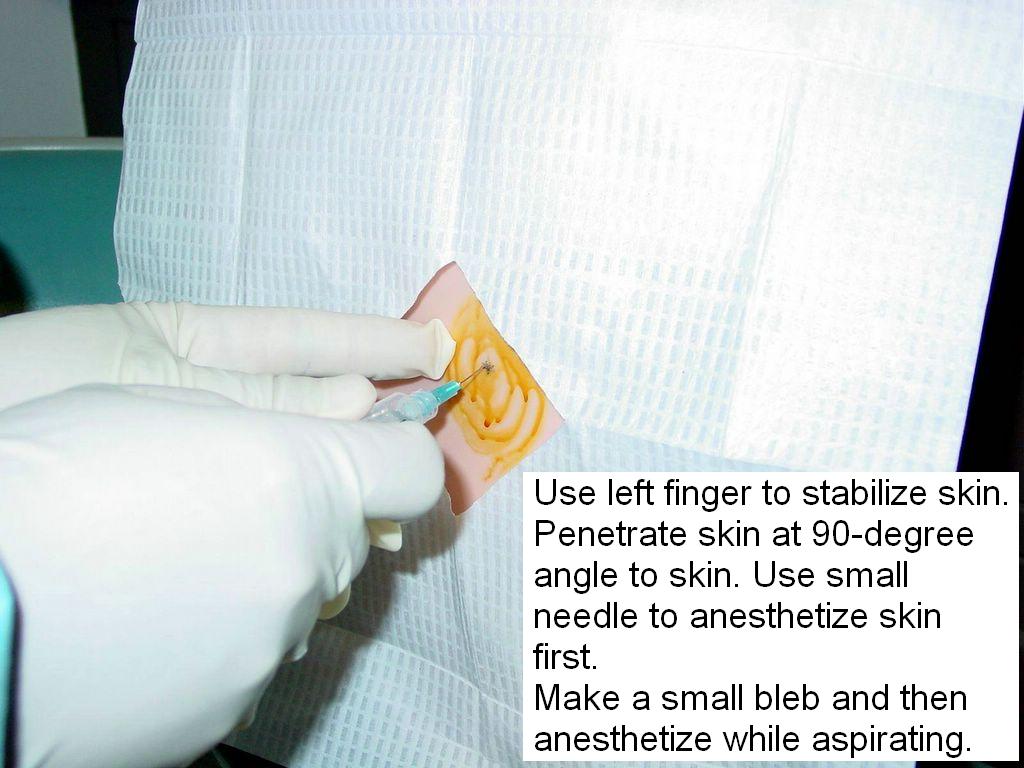
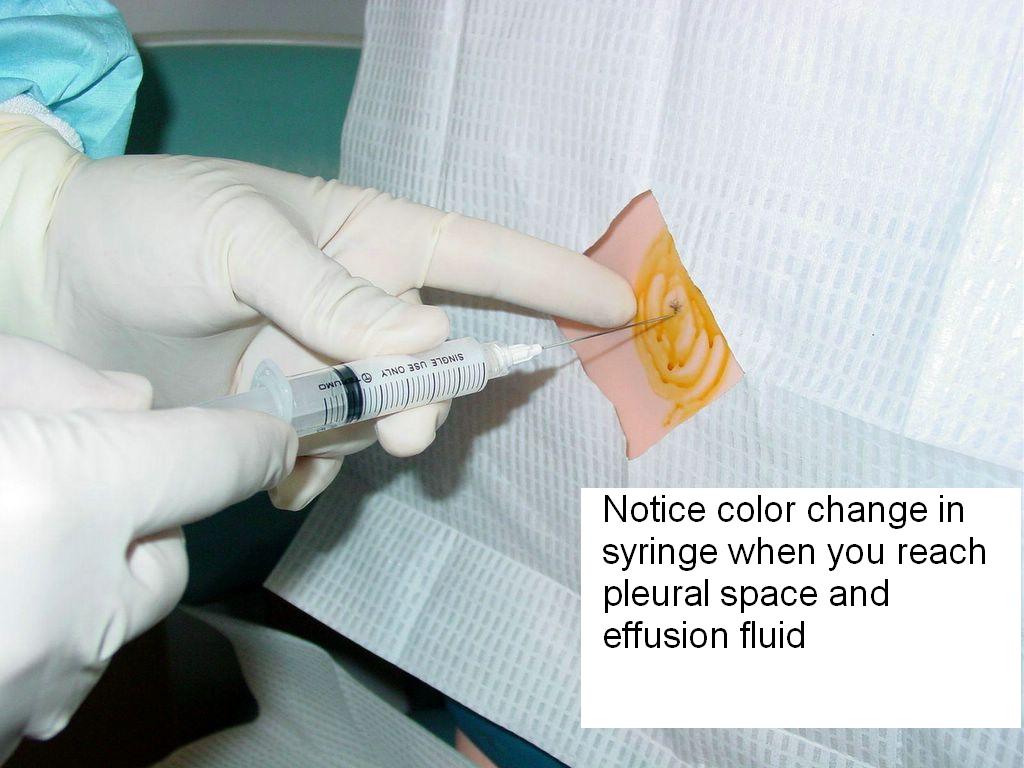
Fig. 16, 17, 18. Perform the procedure (under supervision, if you are not certified). Anesthetize the skin and pleura, try to reach the effusion fluid.


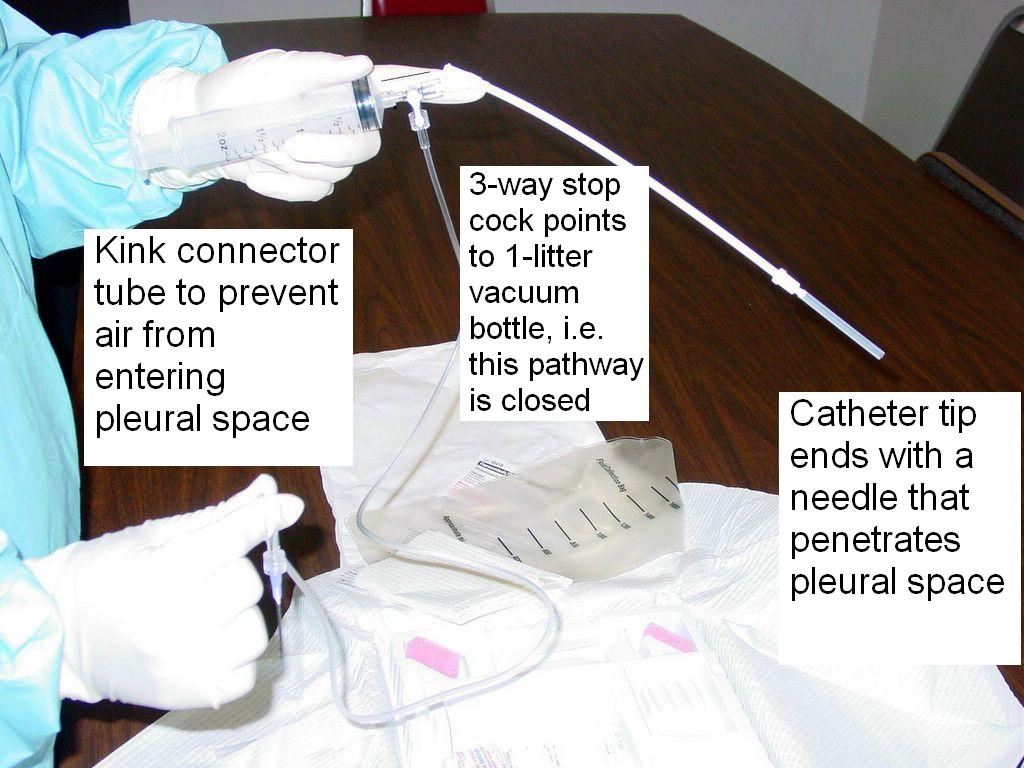
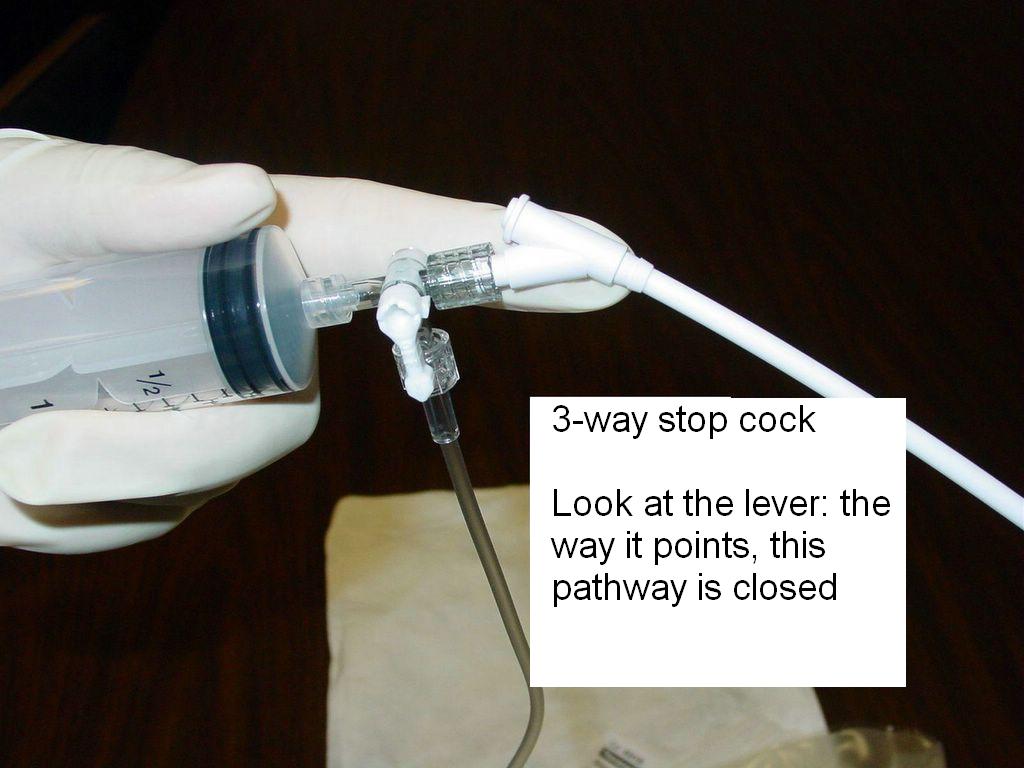
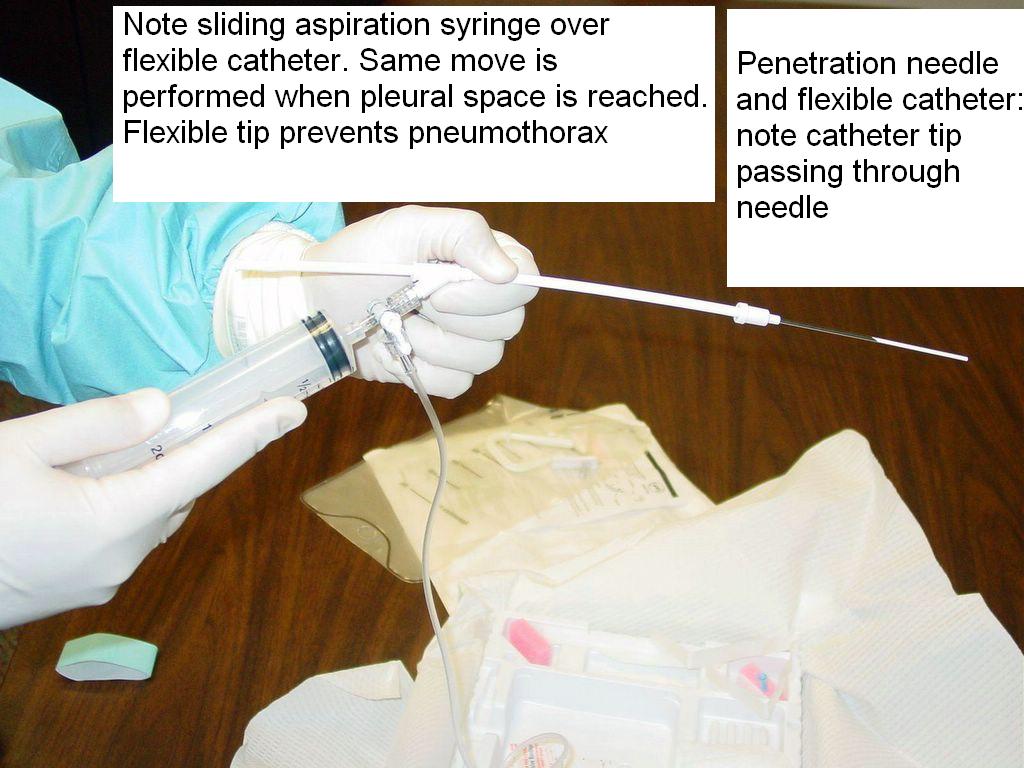
Fig. 19, 20. Prepare the flexible catheter.


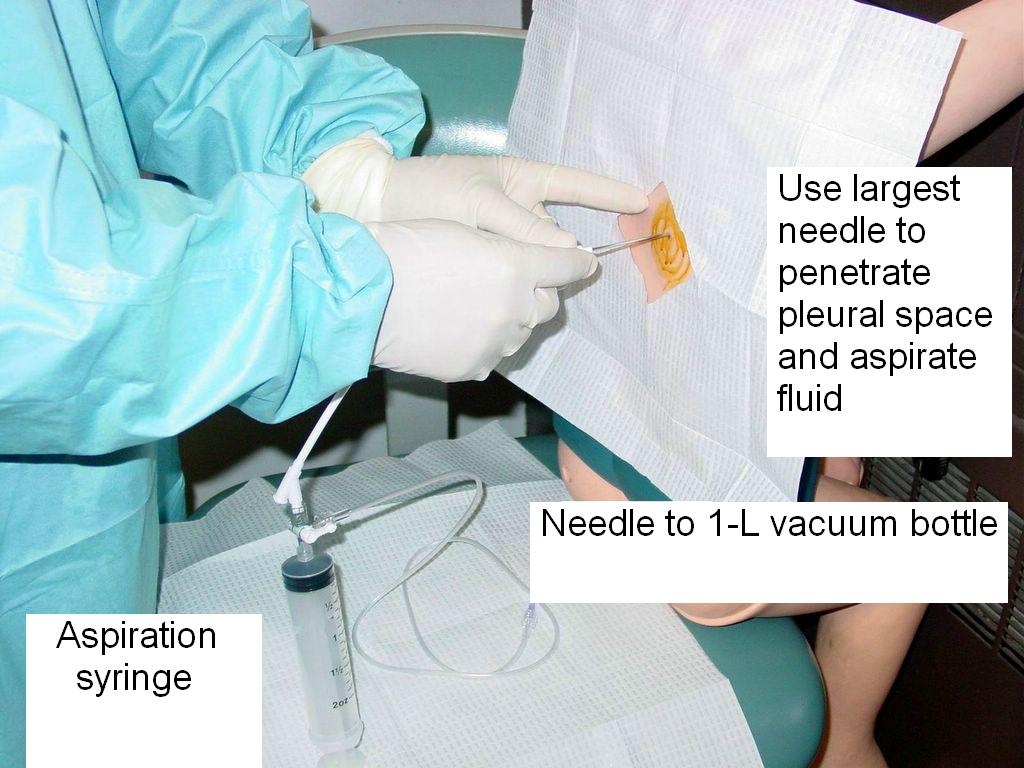
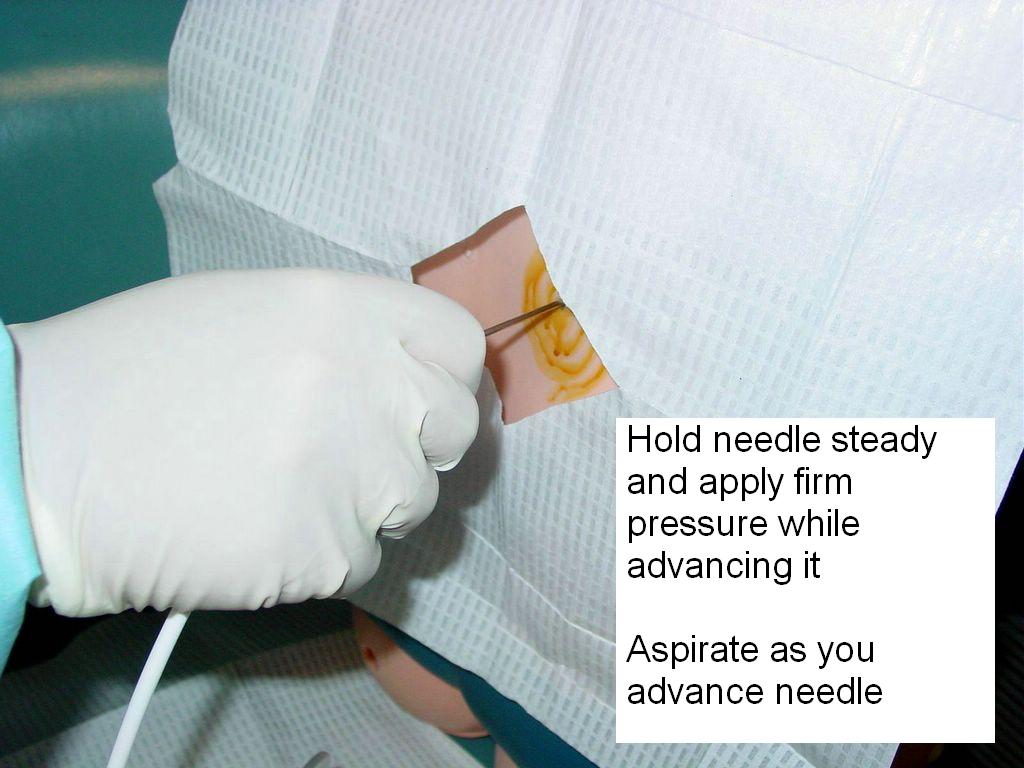
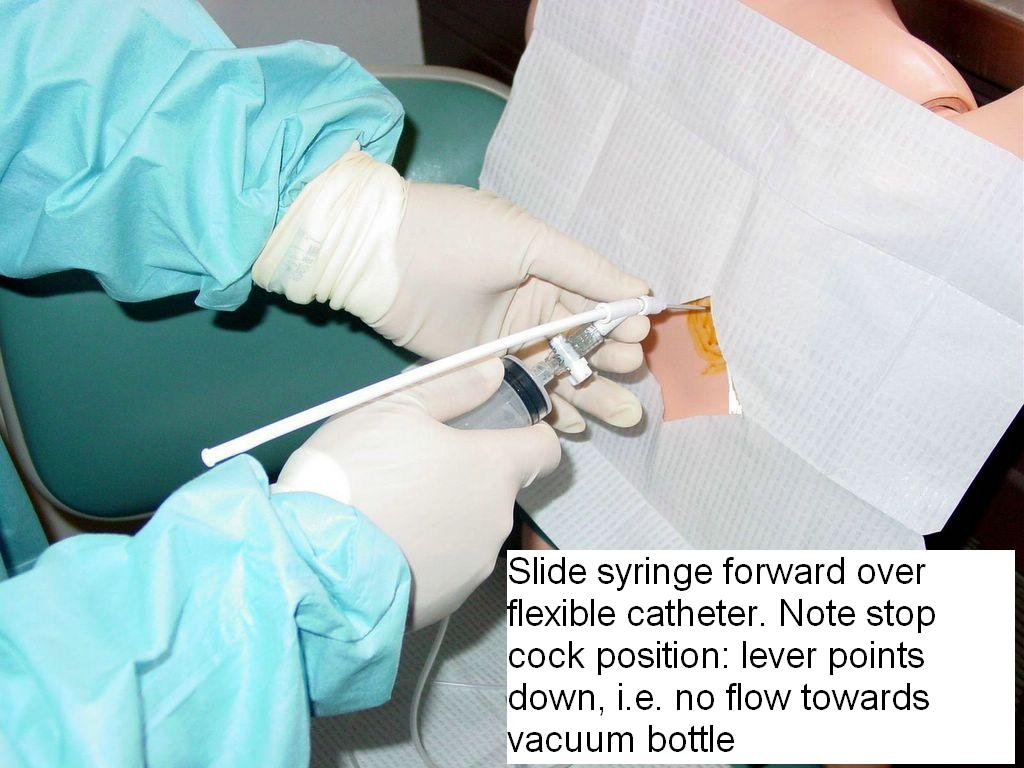
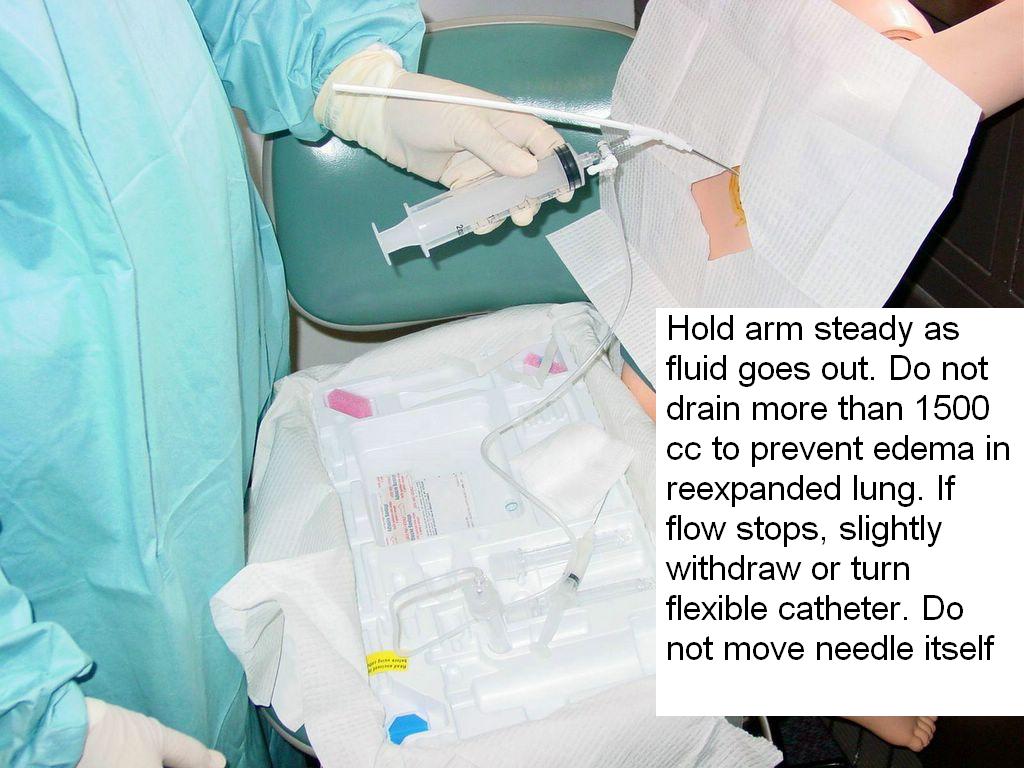
Fig. 21, 22, 23, 24, 25. Pass the flexible catheter over the tap needle into the pleural space and begin aspirating the fluid in the vacuum tubes.


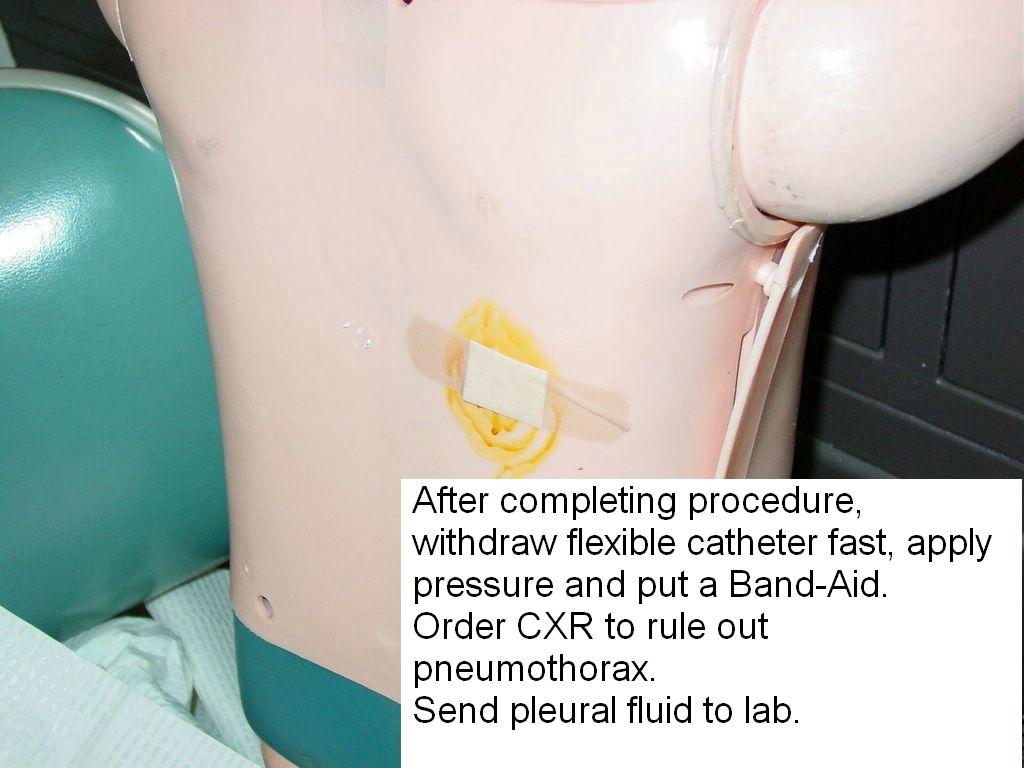
Fig. 26, 27.

Complete the procedure, check for complications - mainly pneumothorax and bleeding. Order a CXR to rule out pneumothorax.

Send the pleural fluid in the 1 L bottle to the laboratory. Compare the pleural fluid to the corresponding blood tests, in order to differentiate between transudate and exudate. If the patient had blood draws this morning, you can order some additional enzymes as AOT (add-on tests), if not already done before the tap.

Complications

Pneumothorax (3-30%)
Hemopneumothorax
Hemorrhage
Hypotension due to a vasovagal response
Pulmonary edema due to lung re expansion
Spleen or liver puncture
Air embolism
Introduction of infection

Write a procedure note which documents the following:

Patient consent
Indications for the procedure
Relevant labs, e.g INR/PTT, platelet count
Procedure technique, sterile prep, anesthetic, amount of fluid obtained, character of fluid, estimated blood loss
Any complications
Tests ordered

References

Thoracentesis. A Chapter in MeisterMed's Procedure Series for PDA. V. Dimov, B. Altaqi, 2/20/2007.
Thoracentesis video from the Loyola University Chicago.
Thoracentesis . The UCSF Hospitalist Handbook.
Thoracentesis video from NEJM, 2006 (paid subscription required).
Diagnostic Approach to Pleural Effusion in Adults. Am Fam Phys, Vol. 73 No. 5, April 1, 2006.
Patient information: Thoracentesis, Medline Plus.
Patient information: Pleural effusion, Medline Plus.
Is Ultrasound-Guided Thoracentesis Safer?, AFP.

Related reading

Becoming a Rural Doctor, Part 5: Procedures for the Rural Doctor. Rural Doctoring, 2008.
Thoracentesis Best Practices: Slideshow. Medscape, 2011.

Disclaimer

The material and/or content on this web site are for informational purposes only. Users of the web site should not act upon any information received from this site without seeking professional consultation. Click here for more information.

Published: 05/11/2005
Updated: 04/17/2008

Paracentesis: A Step-by-Step Procedure Guide

Author:
V. Dimov, M.D., Clinical Assistant Professor of Medicine, Cleveland Clinic Lerner College of Medicine of Case Western Reserve University, Cleveland, Ohio

Indications

New onset ascites or ascites of unknown origin
Patient with a known ascites who has fever, abdominal pain, hypotension or encephalopathy
Symptomatic treatment of large ascites

Contraindications

Uncooperative patient
Uncorrected bleeding diathesis
Acute abdomen that requires surgery
Intra-abdominal adhesions
Distended bowel
Abdominal wall cellulitis at the site of puncture
Pregnancy

Procedure Step-by-Step

Explain the procedure to the patient and obtain a written informed consent, if possible. Explain the risks, benefits and alternatives (RBA).

Commercial paracentesis kits are pre-assembled. If you do not have a commercial kit, this is a list of the equipment you need to perform a successful paracentesis:

16 G Angiocath (or a spinal needle) x 1
10 cc syringe x 1
One-liter vacuum bottle x 5
Thoracentesis kit tubing x 2
Sterile gloves x 2
Betadine swab x 3
Sterile drape x 2
4x4 sterile gauze x 4
Band-aid x 1

Four steps of the paracentesis procedure

1. Ultrasound scan before the procedure
2. Patient preparation
3. Procedure
4. Laboratory results

1. Ultrasound scan before the procedure

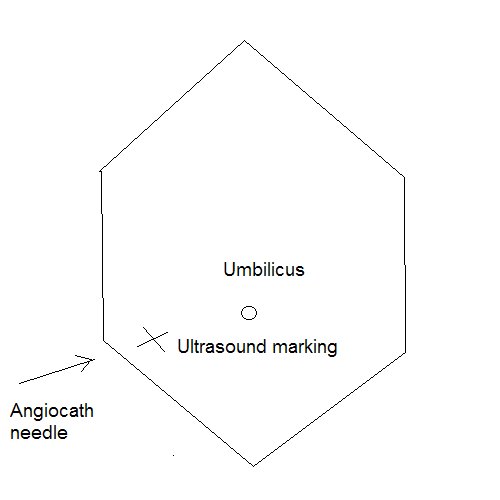
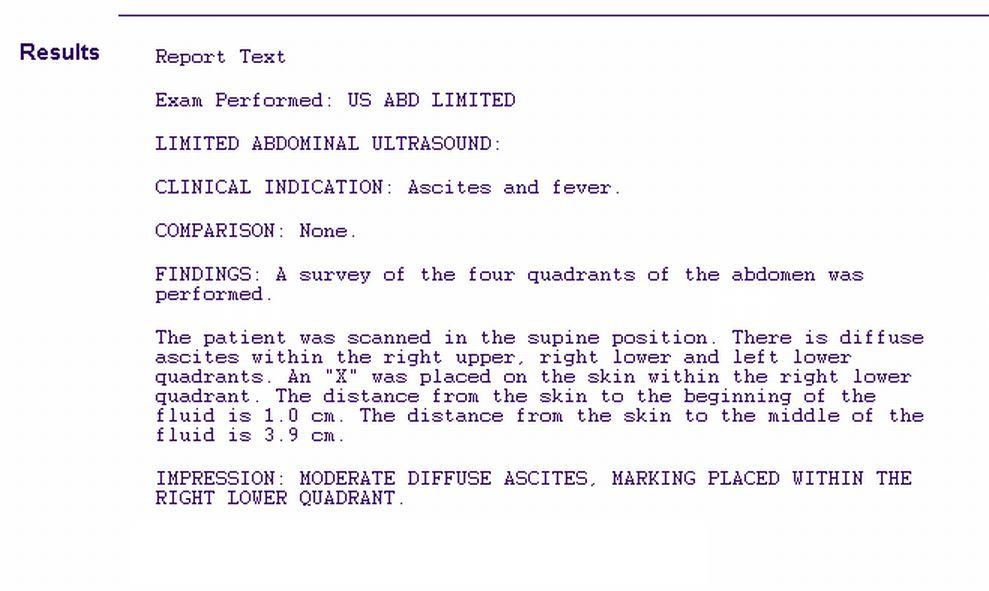
If is is very helpful to get an ultrasound scan of the ascites before the procedure. The radiologist will mark the spot for paracentesis. Two things are important:

- What is the distance from the skin to the fluid? Usually 1 cm. It gives you an idea how deep you have to go with the needle before getting fluid in the syringe.

- What is distance to the midpoint of the collection? Usually 3 cm. It gives you an idea how deep you can go with the needle in relative safety. Generally, the advice is as soon as you reach the fluid, to advance the needle just a little and then to thread in the plastic catheter, and to take the needle out.
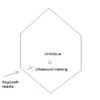

Ultrasound marking and direction of Angiocath needle (click to enlrage)
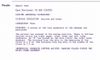

Ultrasound report of ascites for paracentesis

2. Patient preparation

Explain the RBA (risks, benefits, alternatives) to the patient. Make sure that he understands and agrees. If the patient does not understand the procedure, he or she cannot provide an informed consent and you have to ask a relative who has a durable power of attorney for health care or is next of kin.

Explain what is going on while performing the procedure, this will alleviate both the patient's anxiety and yours.

Ask the the patient to urinate before the procedure or use a Foley to empty the bladder. Position the patient in the bed with the head elevated at 45-60 degrees to allow fluid to accumulate in lower abdomen.

3. Procedure

Preparation for the procedure:

Get all the things ready at the bedside. Briefly explain to the patient what the different parts of kit are used for. Get a trash bin nearby to dispose of the plastic envelopes of needles and tubing.

The patient should lie on his back in a slightly recumbent position toward the site of paracentesis. Percuss the area of dullness to ensure that is correspond well the the ultrasound marking. Insertion site is inferior to umbilicus and at the level of percussed dullness, usually 2-3 fingerbreadths below the umbilicus.

Clean the area with betadine in a circular fashion from the center out. Apply the sterile drapes. You will place the opened parts of the kit on the drape.

Open the 16 G Angiocath and syringe place them on the sterile drapes. Place the 1-L vacuum bottles nearby.

From this point on, you have to wear sterile gloves, so please ensure that you have everything you need in the sterile area. It is time-consuming to have to reach for, let's say additional tubing in the non-sterile area and then to remove the soiled sterile gloves and to put new ones. Make sure that you have everything you need for the procedure in the sterile area.

Try to make sure that the Angiocath fits the tubing. All needles, syringes and tubing should fit.

Procedure technique:

If the marked site is in the RLQ, pull the skin down and go in with the Angiocath, then release the skin (this is called Z-technique which creates a skin track to stop ascitic fluid from leaking out after the procedure). Aspirate as you go in. Once you reach fluid in the needle, advance the needle just a little, then thread in the plastic part while withdrawing the needle. Aspirate again to make sure that the plastic catheter is still inside the fluid collection. If you get fluid in the syringe, everything is fine, unscrew the syringe and connect the tubing to the 1-L vacuum bottle.

If you cannot get fluid after withdrawing the needle, try to reposition the catheter. If still there is no fluid, you can try to pull out and reintroduce the needle (if kept sterile). Do not push hard or deeper than the midpoint of the collection as seen on the ultrasound scan.

If you are unsuccessful in obtaining ascitic fluid, you can ask for an ultrasound-guided paracentesis.

After the procedure, ask the patient to lie in his bed for 4 hours and the nurse to check vital signs q 1 hr for 4 hours to avoid hypotension.

It is generally recommended to give 25 cc of albumin (25% solution) for every 2 liters of ascitic fluid removed. For example, if the patient had a 4-liter paracentesis, he should receive 50 cc of albumin IV (25% solution) over 2 hours. The rationale for giving albumin is to avoid intravascular fluid shift and renal failure after a large-volume paracentesis.

Complications

Persistent leak from the puncture site
Abdominal wall hematoma
Perforation of bowel
Introduction of infection
Hypotension after a large-volume paracentesis
Dilutional hyponatremia
Hepatorenal syndrome
Major blood vessel laceration
Catheter fragment left in the abdominal wall or cavity

Write a procedure note which documents the following:

Patient consent
Indications for the procedure
Relevant labs, e.g INR/PTT, platelet count
Procedure technique, sterile prep, anesthetic, amount of fluid obtained, character of fluid, estimated blood loss
Any complications
Tests ordered

4. Laboratory results

Send the sample to the lab. Usually, you send only one of the 1-L bottles. The rest of the bottles (2-3, if it was a large-volume paracentesis) are disposed of in the biohazard area.

Order the relevant tests and check them yourself or sign out for somebody to check them.

General labs:
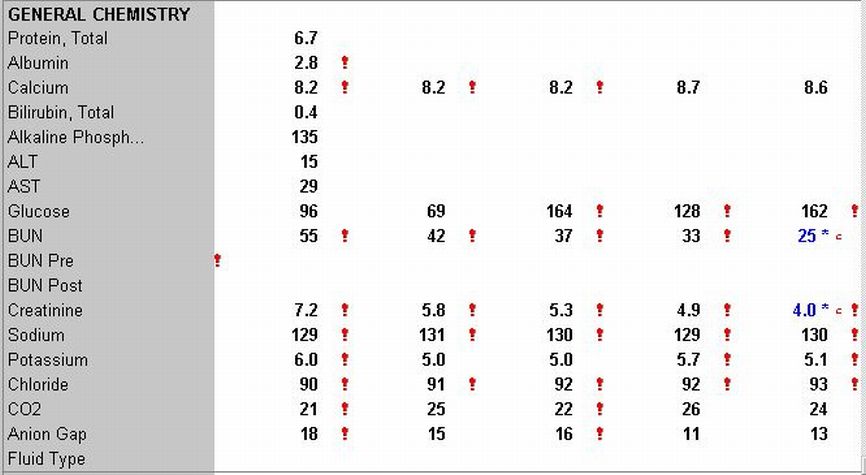
Ammonia, CBC, CMP, albumin, amylase, lipase, INR/PTT.

Labs for paracentesis ascitic fluid:
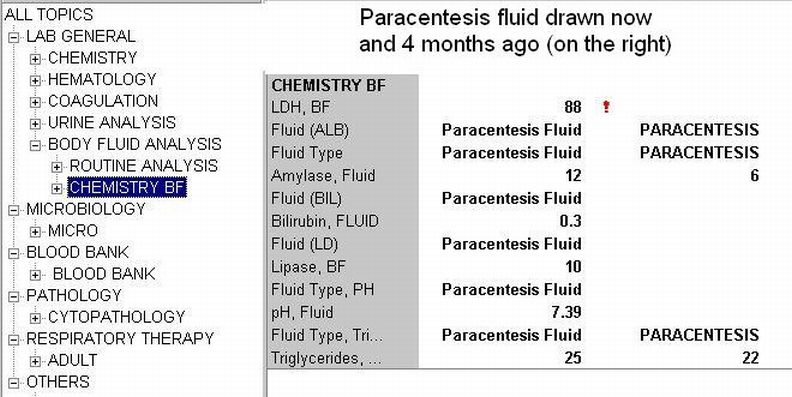
Protein, albumin, specific gravity, glucose, bilirubin, amylase, lipase, triglyceride, LDH
Cell count and differential
C&S, Gram stain, AFB, fungal
Cytology
pH

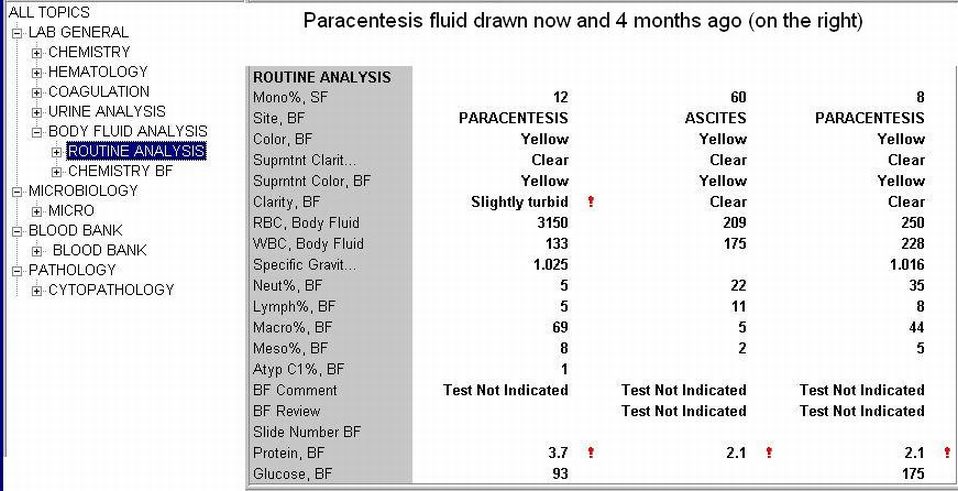
Your responsibility does not end with performing the procedure. You have to make sure that somebody follows on the test results and acts accordingly, e.g. prescribes antibiotics if the fluid shows SBP.
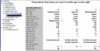

Paracentesis fluid analysis of a patient with ascites due to cirrhosis


CMP of a patient with ascites due to cirrhosis

References

Paracentesis. eMedicine.
Paracentesis. NEJM (subscription required)
Paracentesis. Blueprints Clinical Procedures, Google Books
Paracentesis. Handbook Of Gastroenterologic Procedures, Google Books
Paracentesis. Med.buffalo.edu
Practical Procedures - a complete guide
UCSF Hospitalist Handbook - Procedures
Abdominal Paracentesis. Medicineclinic.org
Medicine, Medical Books, Current Clinical Strategies Publishing
Cirrhotic Ascites - clevelandclinicmeded.com
Minimizing ascites - postgradmed.com
Patient information: Abdominal tap - Medline Plus
Arrow Large Volume Abdominal Paracentesis Kit
Videos by Proficient Procedures, Inc. USA, $ 50 for 6 procedure videos
The 'wrong' fluid. GruntDoc.com.

Related reading

Becoming a Rural Doctor, Part 5: Procedures for the Rural Doctor. Rural Doctoring, 2008.

Disclaimer

The material and/or content on this web site are for informational purposes only. Users of the web site should not act upon any information received from this site without seeking professional consultation. Click here for more information.

Published: 03/20/2006
Updated: 04/17/2008
Central Line Placement with Ultrasound Guidance: A Step-by-Step Procedure Guide with Photos

Authors:
V. Dimov, M.D., Clinical Assistant Professor of Medicine, Cleveland Clinic Lerner College of Medicine of Case Western Reserve University, Cleveland, Ohio; B. Altaqi, M.D., Assistant Clinical Professor of Medicine, University of Louisville, Kentucky

See the slide show or click on the images below for step-by-step instructions. A free PDA version of this procedure guide is available from MeisterMed, iSilo reader for PDA is required to view the images.

Indications

Venous access is needed for intravenous fluids or antibiotics and a peripheral site is unavailable or not suitable
Central venous pressure measurement
Administration of certain chemotherapeutic drugs or total parenteral nutrition (TPN)
For hemodialysis or plasmapheresis

Contraindications

Uncooperative patient
Uncorrected bleeding diathesis
Skin infection over the puncture site
Distortion of anatomic landmarks from any reason
Pneumothorax or hemothorax on the contralateral side

Relative contraindications

Positive end-expiratory pressure (PEEP) mechanical ventilation
Only one functioning lung

Procedure Step-by-Step

Explain the procedure to the patient and obtain a written informed consent, if possible. Explain the risks, benefits and alternatives (RBA).


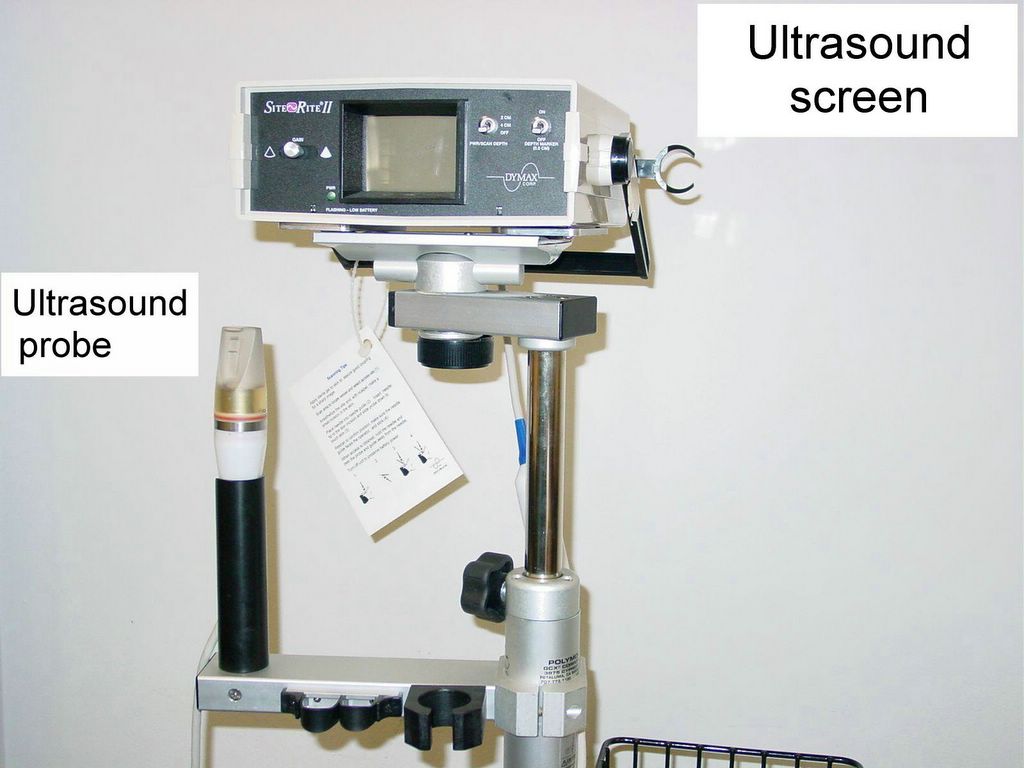
Fig. 1, 2. Ultrasound machine (SiteRite II).


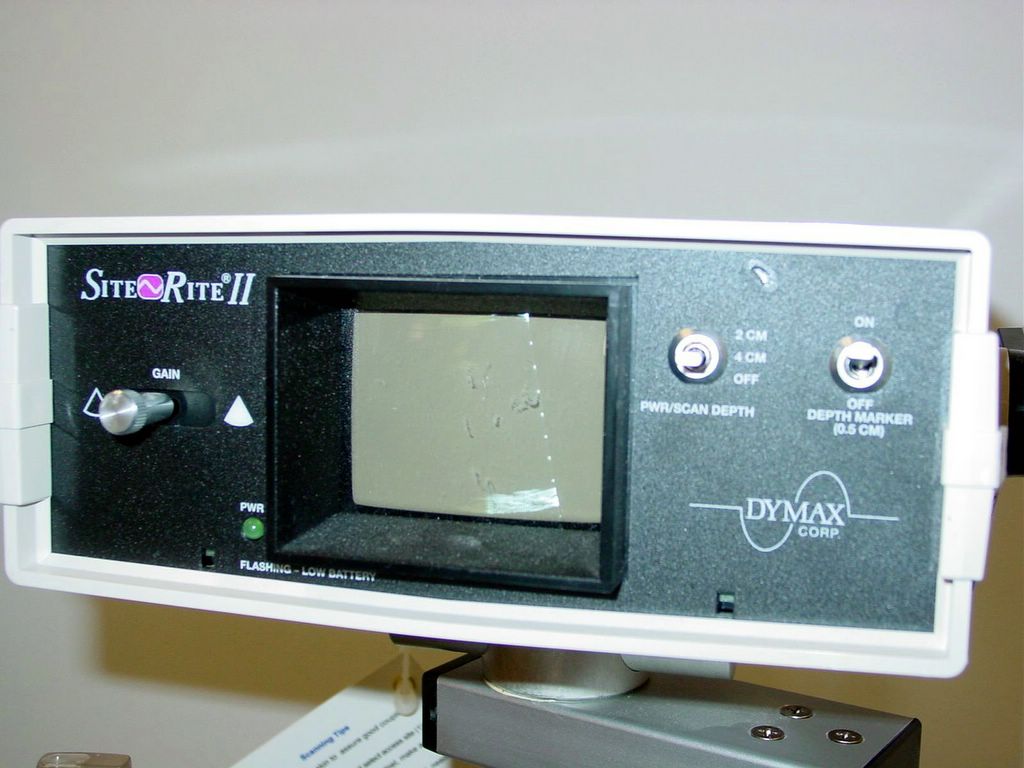
Fig. 3, 4, 5. Ultrasound screen and dept adjustment switch.

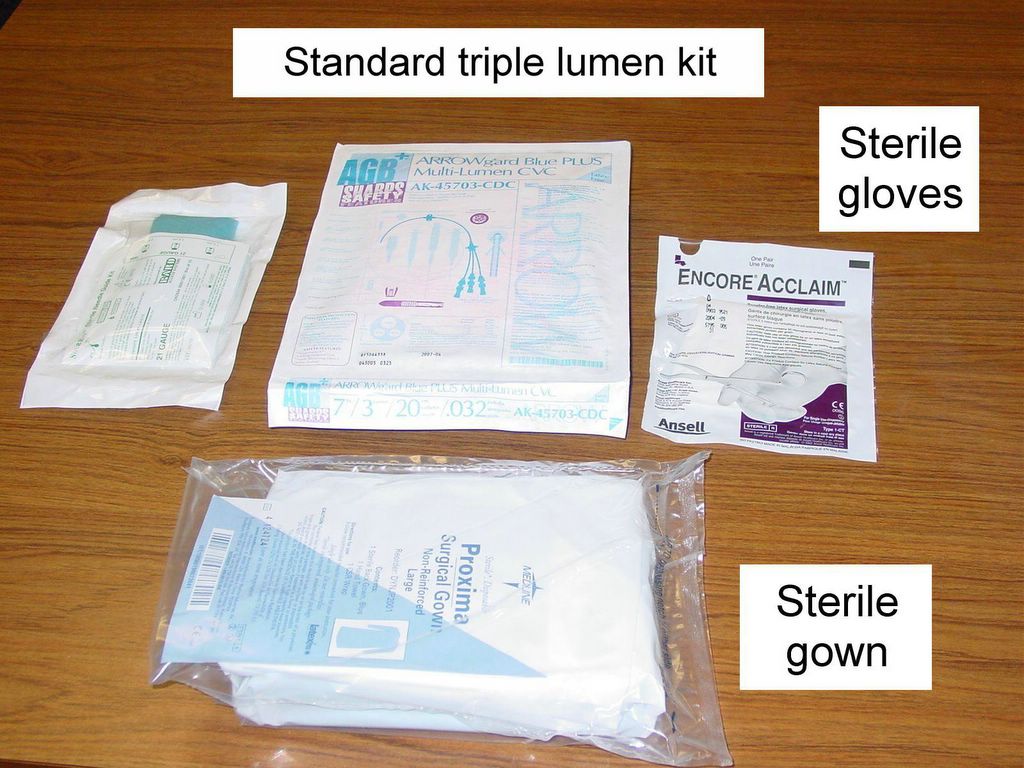
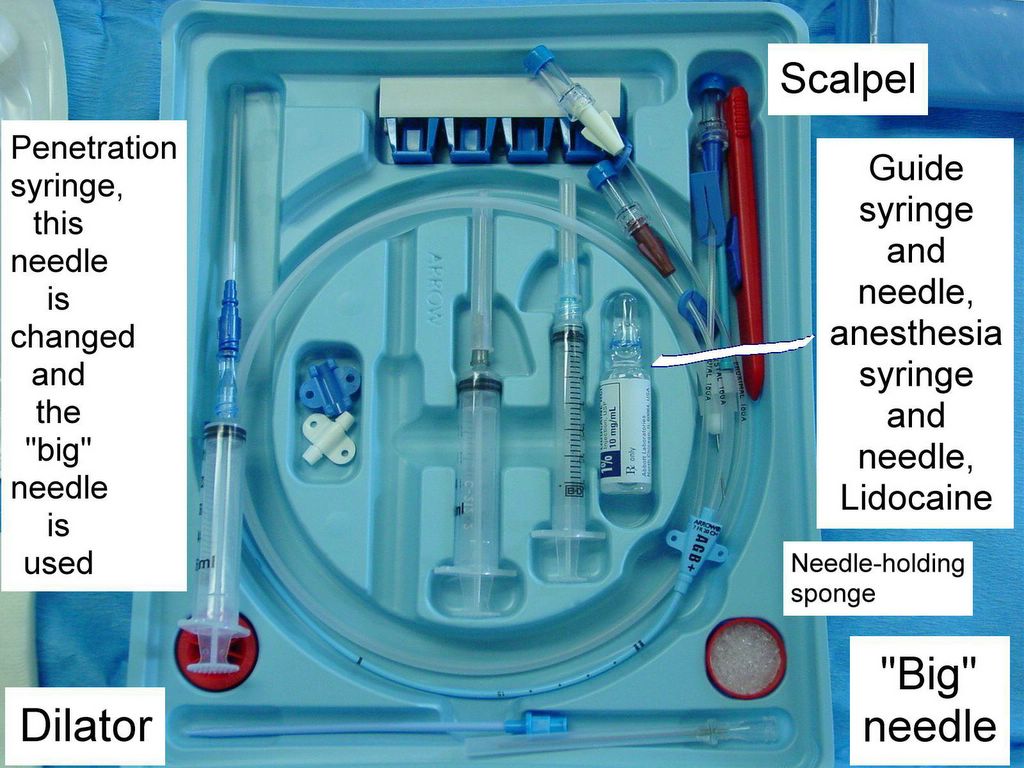
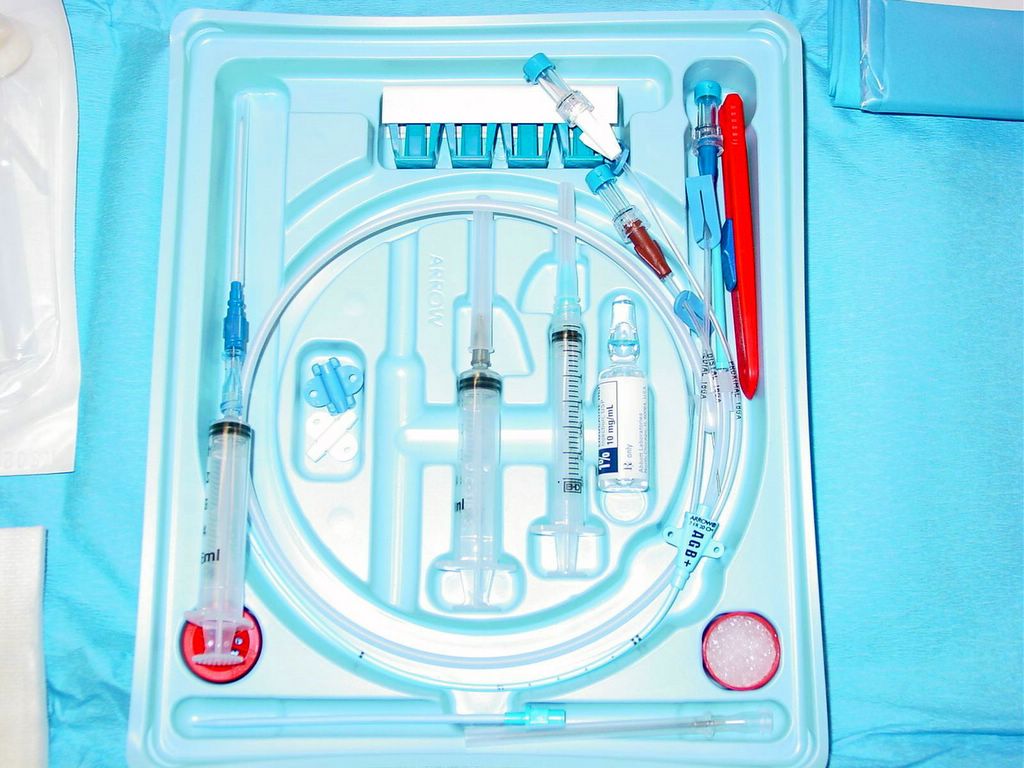
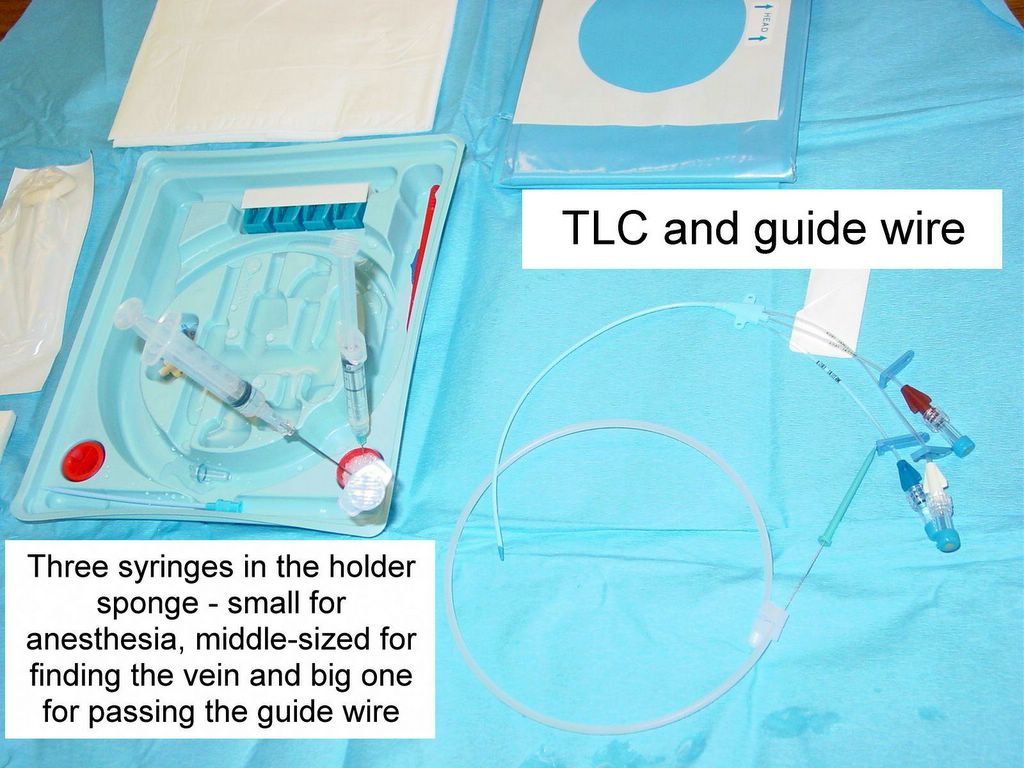
Get to know the equipment in the standard central line placement kit. We will use the terms central line and triple lumen catheter (TLC) interchangeably in this article.


Fig. 6. Equipment needed for TLC.


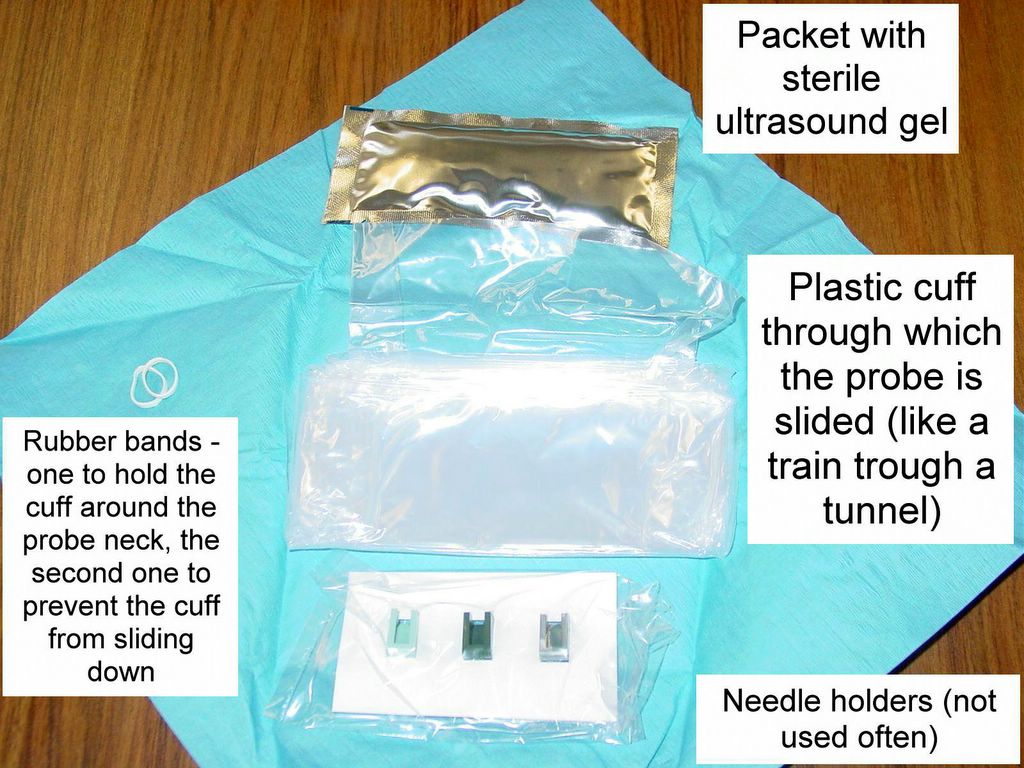
Fig. 7. Open one of the individual packages that come with the SiteRite machine and inspect the content. Each package is one-time-use only.


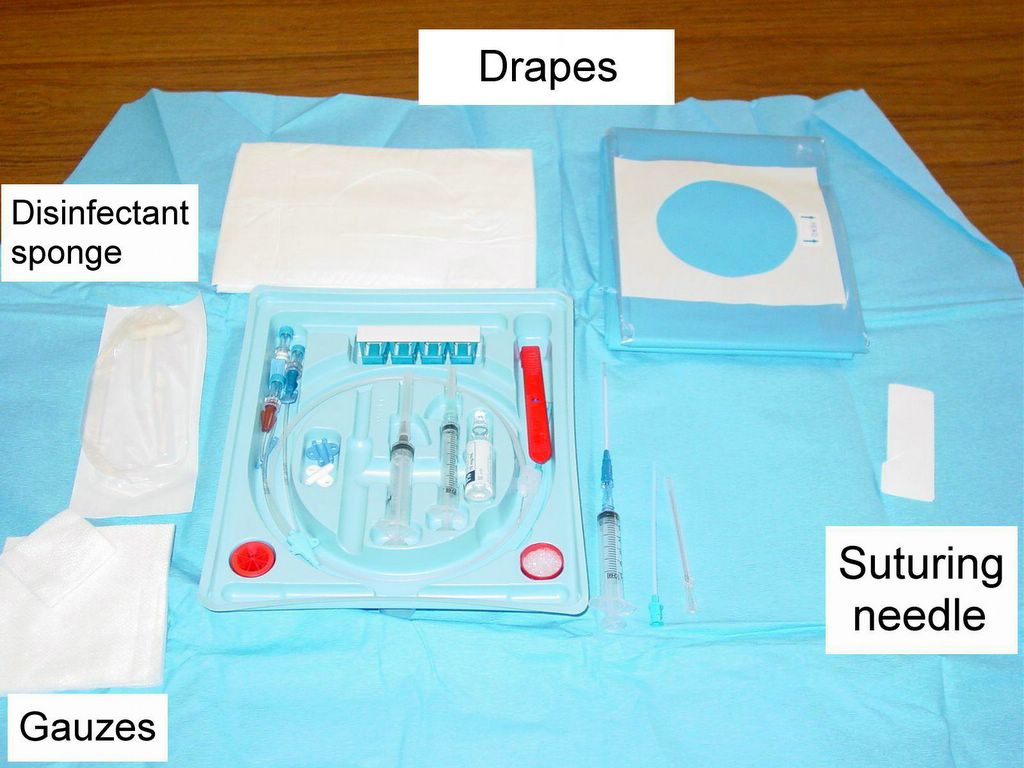
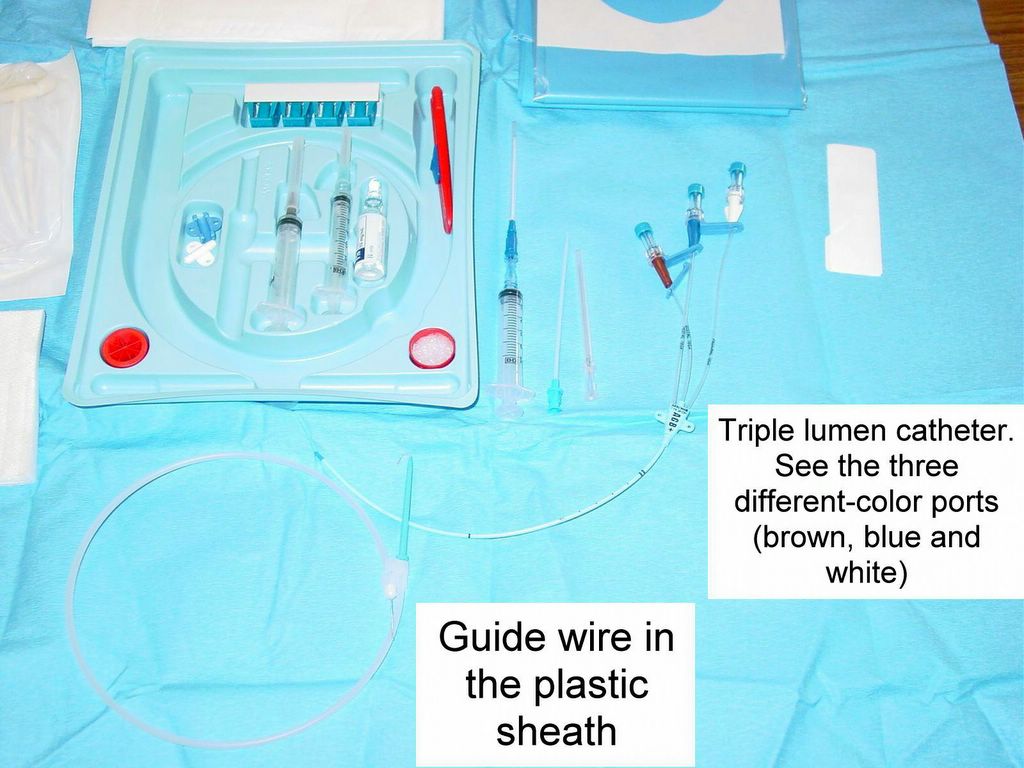
Fig. 8, 9, 10, 11. Open the standard TLC placement kit and inspect the content. You have to know what each part of the kit is used for.


Fig. 12, 13. Take a look at the guide wire.


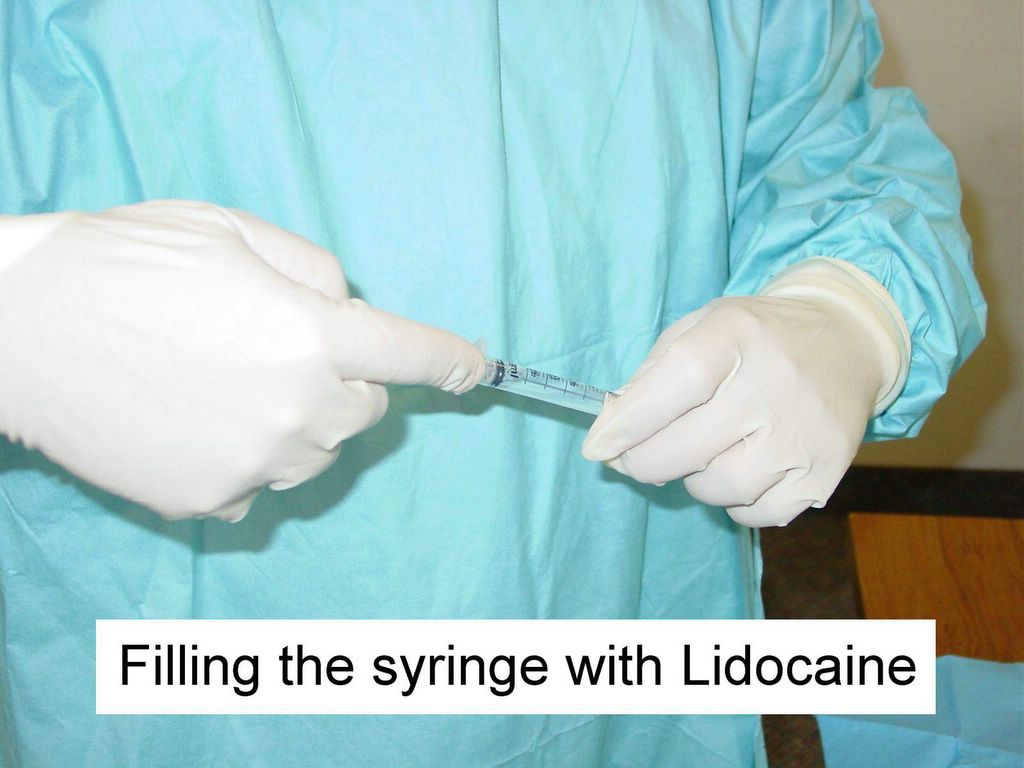
Fig. 14, 15. Lidocaine is used for local anesthesia.


Fig. 16, 17, 18, 19. Fill the wells of the kit with normal saline and flush the TLC.


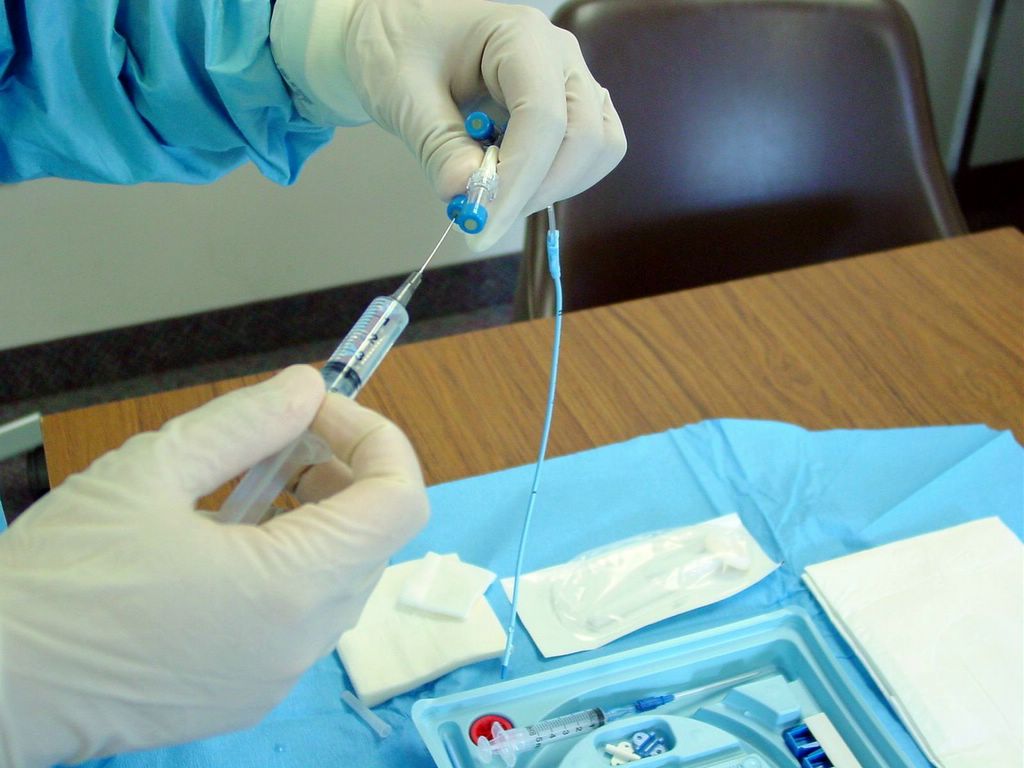
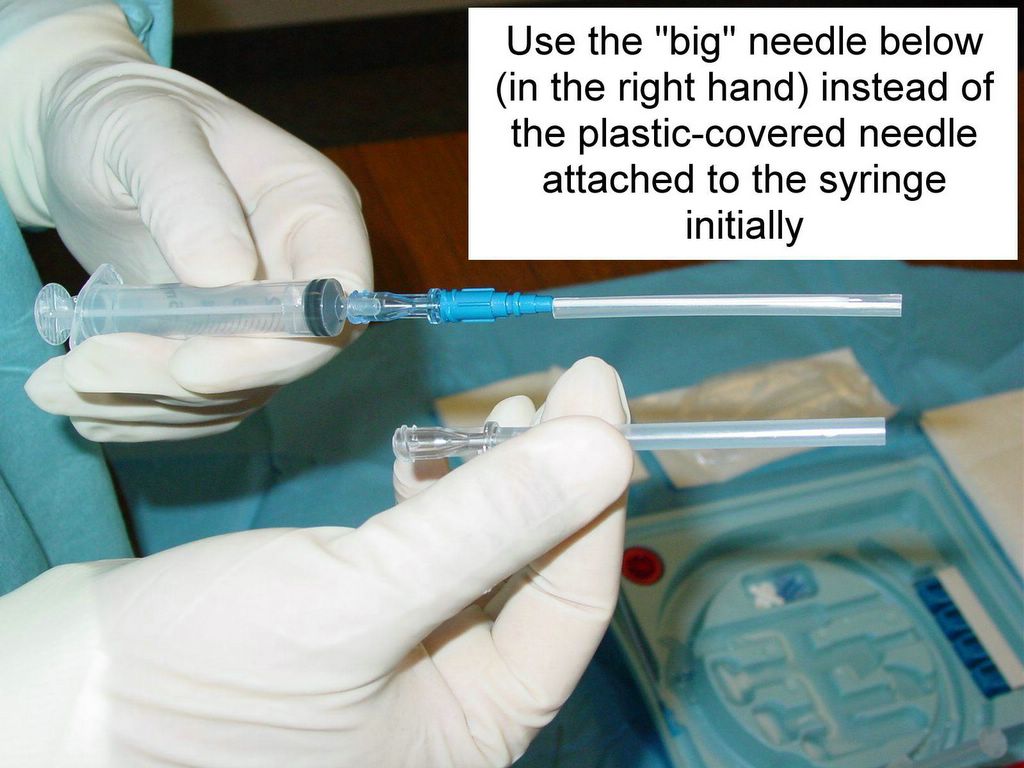
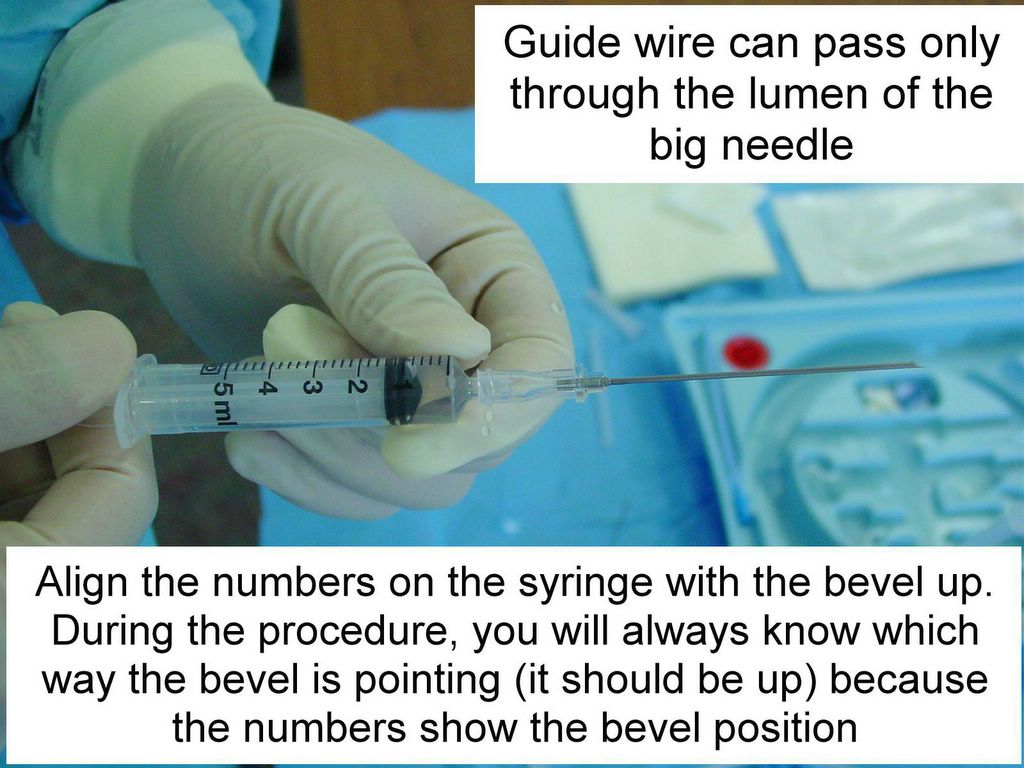
Fig. 20, 21, 22, 23, 24. Check the needles and syringes (three of each).


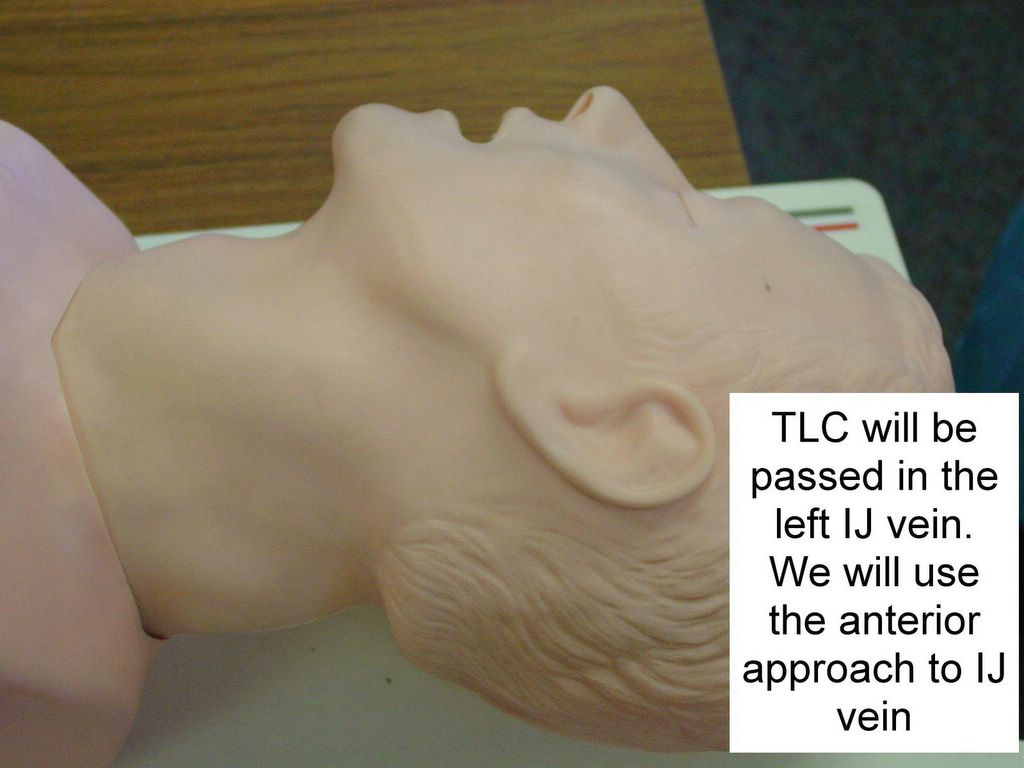
Fig. 25, 26. Inspect the patient, check the anatomical landmarks.


Fig. 27, 28, 29. Disinfect the skin and apply the local anesthesia.


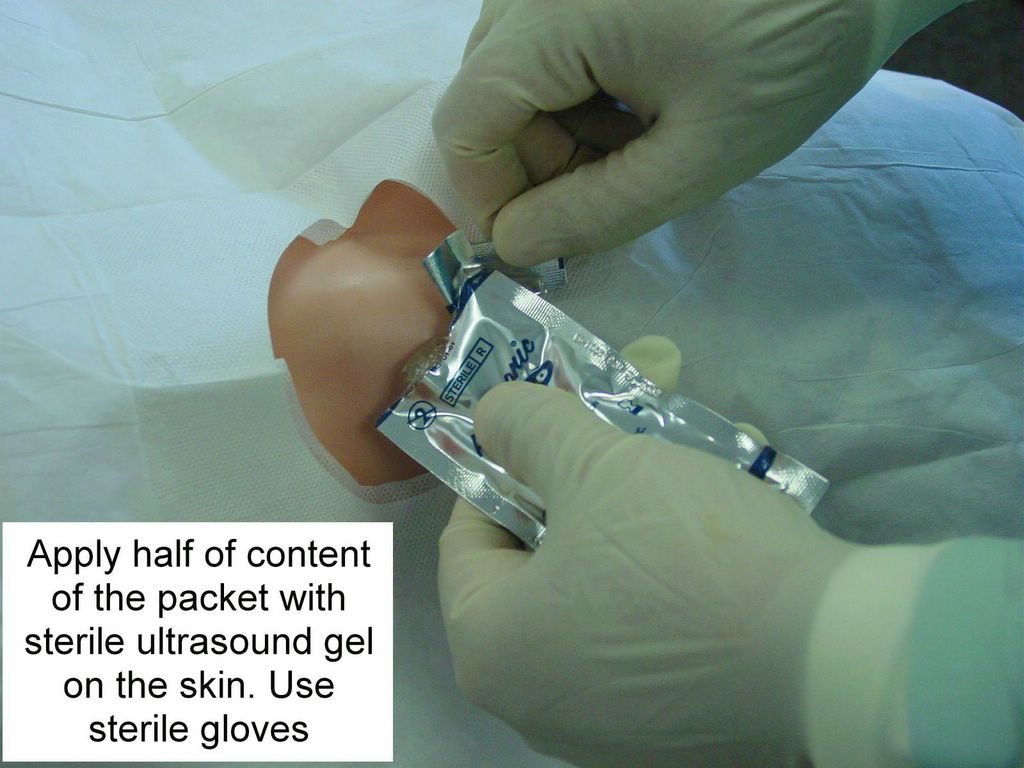
Fig. 30. Apply the sterile ultrasound gel on the skin.


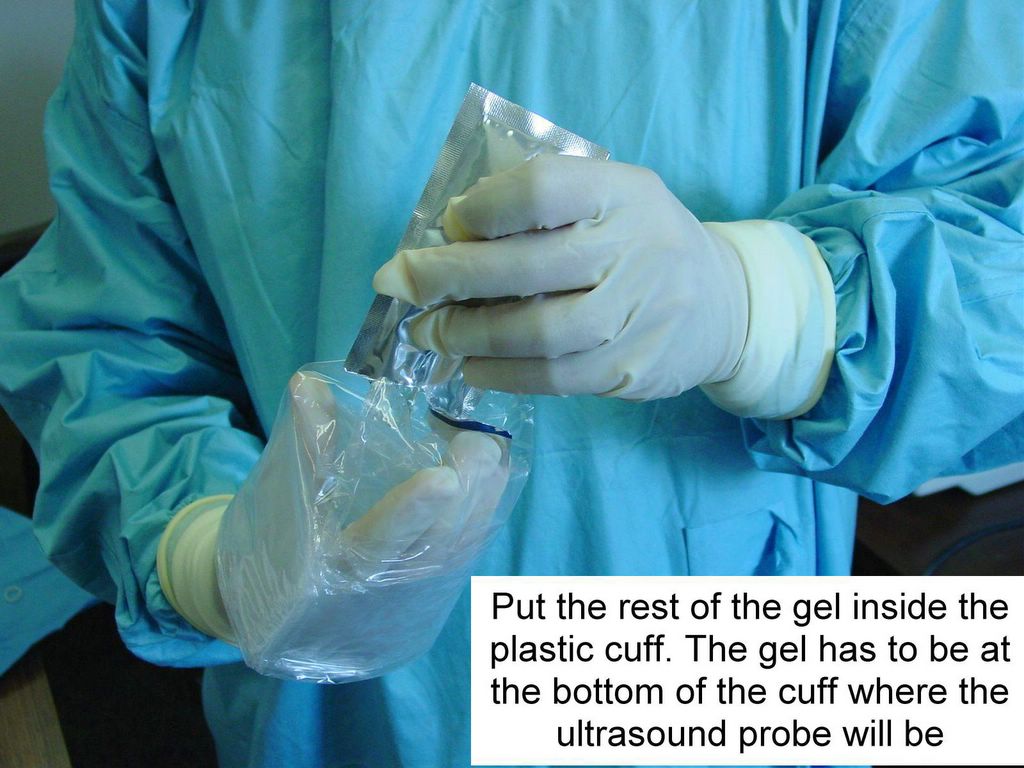
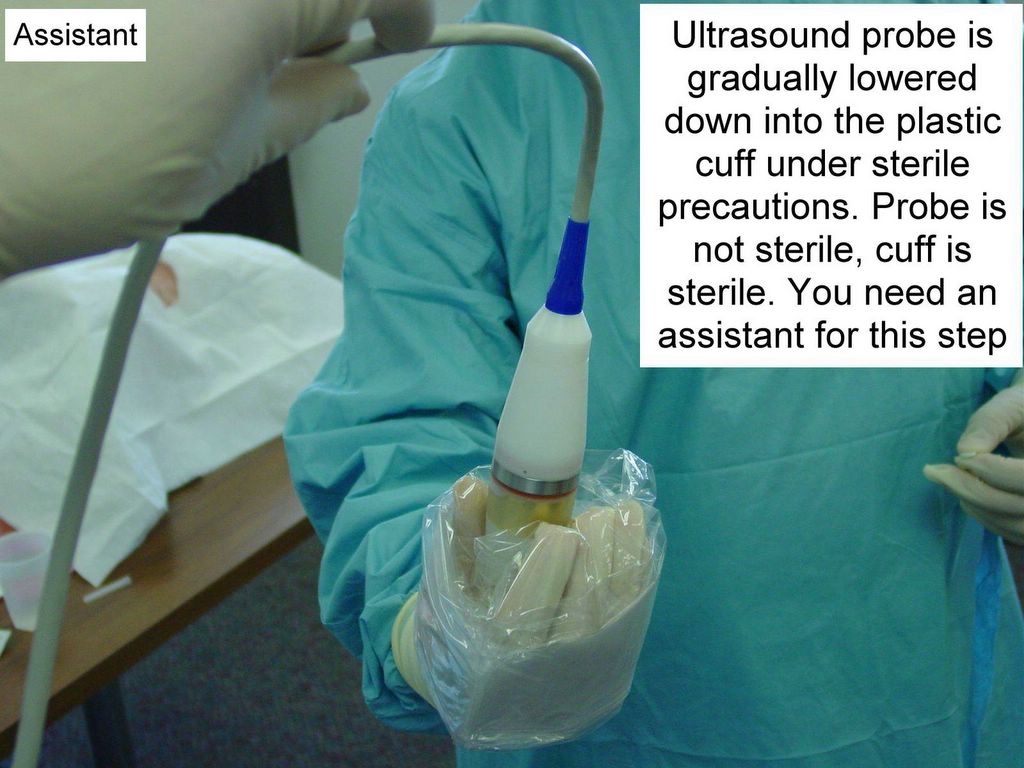
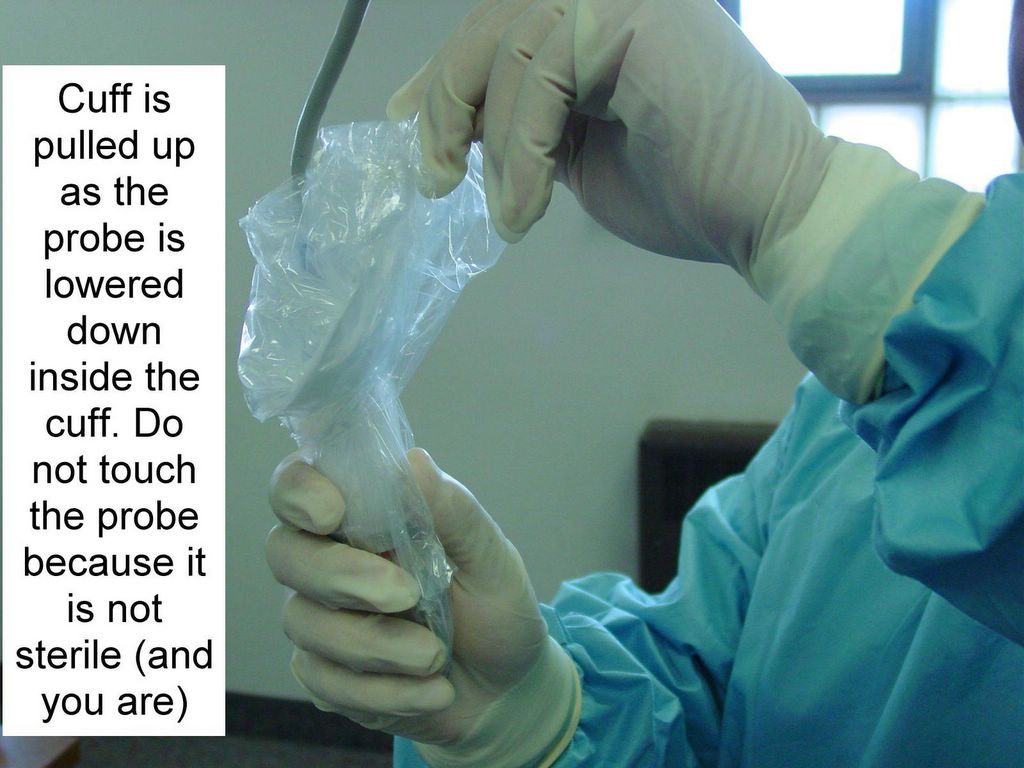
Fig. 31, 32, 33, 34. Put the sterile plastic cuff around the non sterile ultrasound probe.


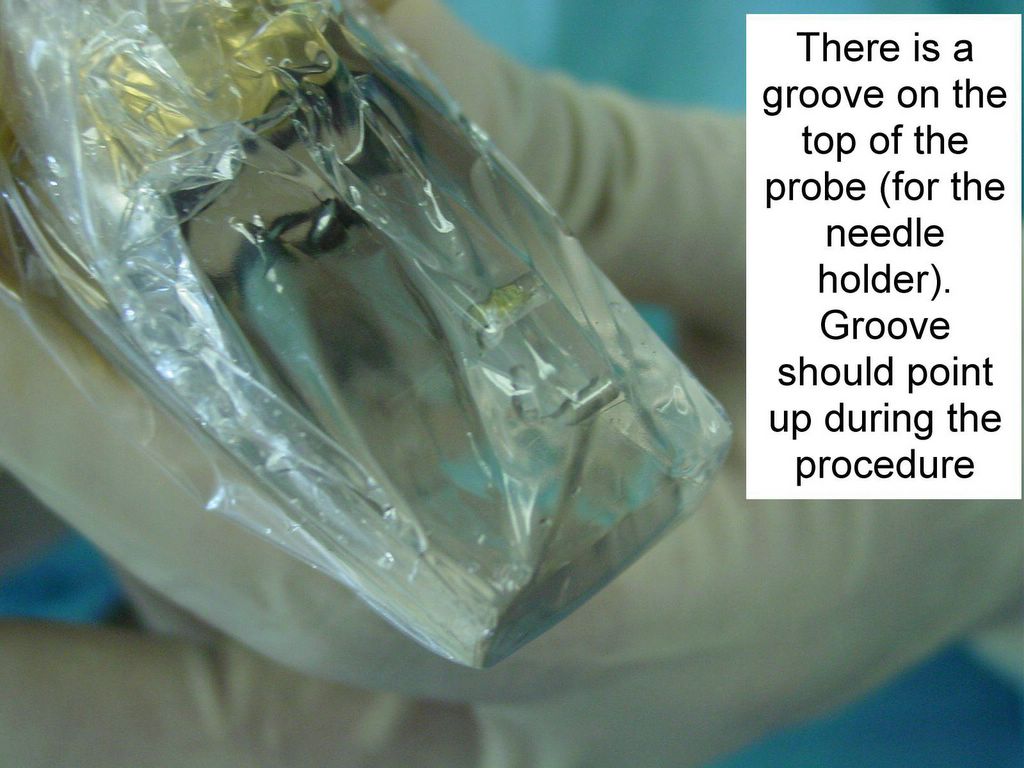
Fig. 35, 36. Inspect the head of the ultrasound probe, position the groove to point upwards.


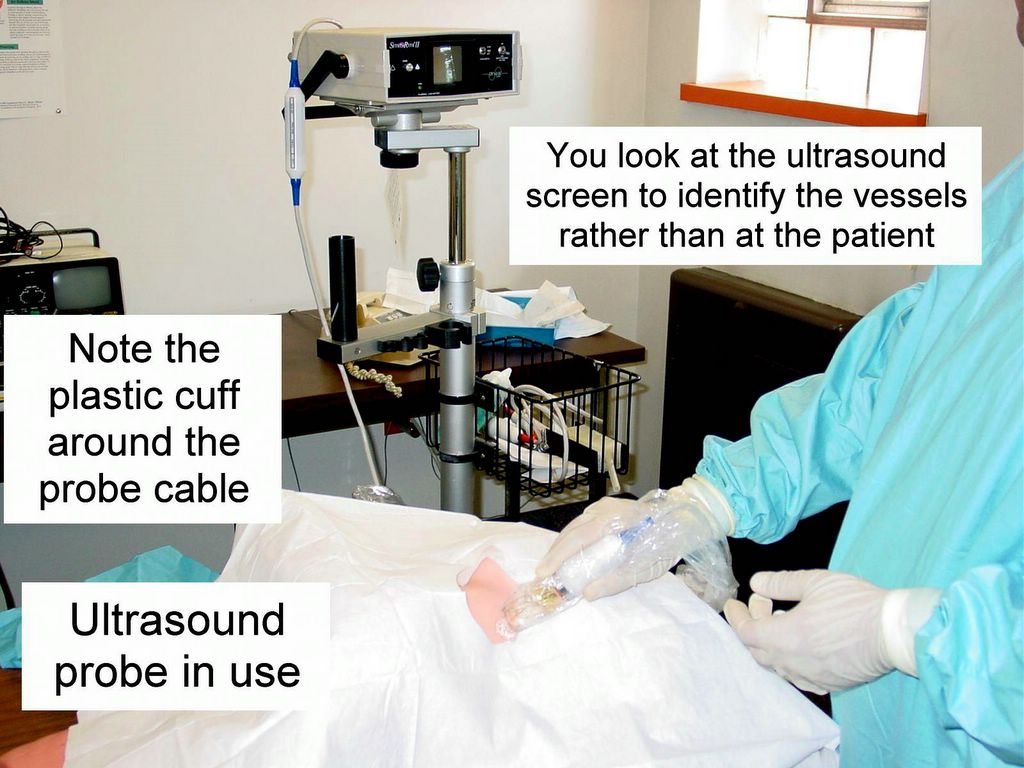
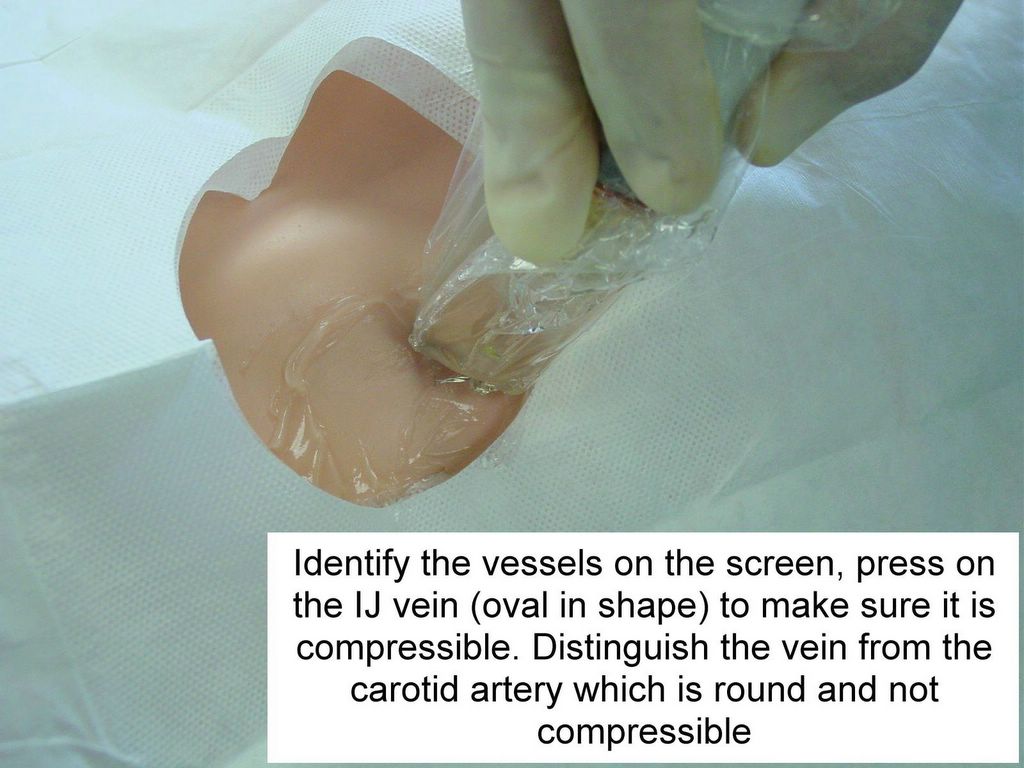
Fig. 37, 38, 39. Monitor the ultrasound screen during the procedure. Once you have found the IJ vein, proceed as usual (described in the captions on the photos).


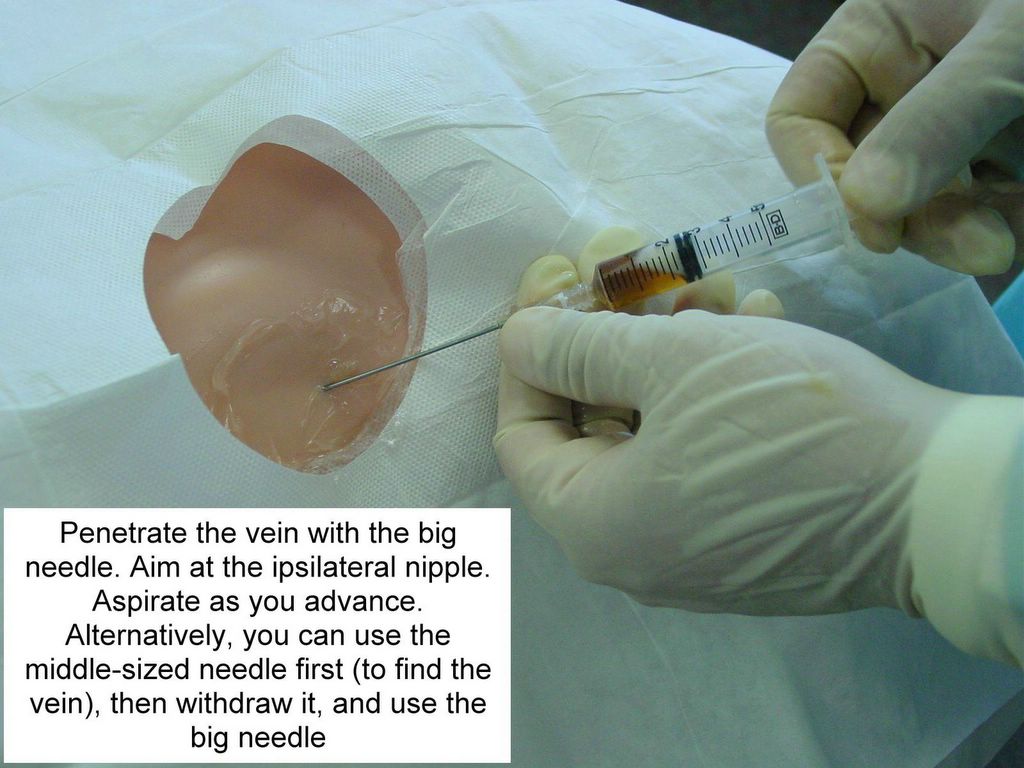
Fig. 40, 41. Start the "real thing" - look for the vein with the big needle (strategy one), or with the smaller guide needle first (strategy two).


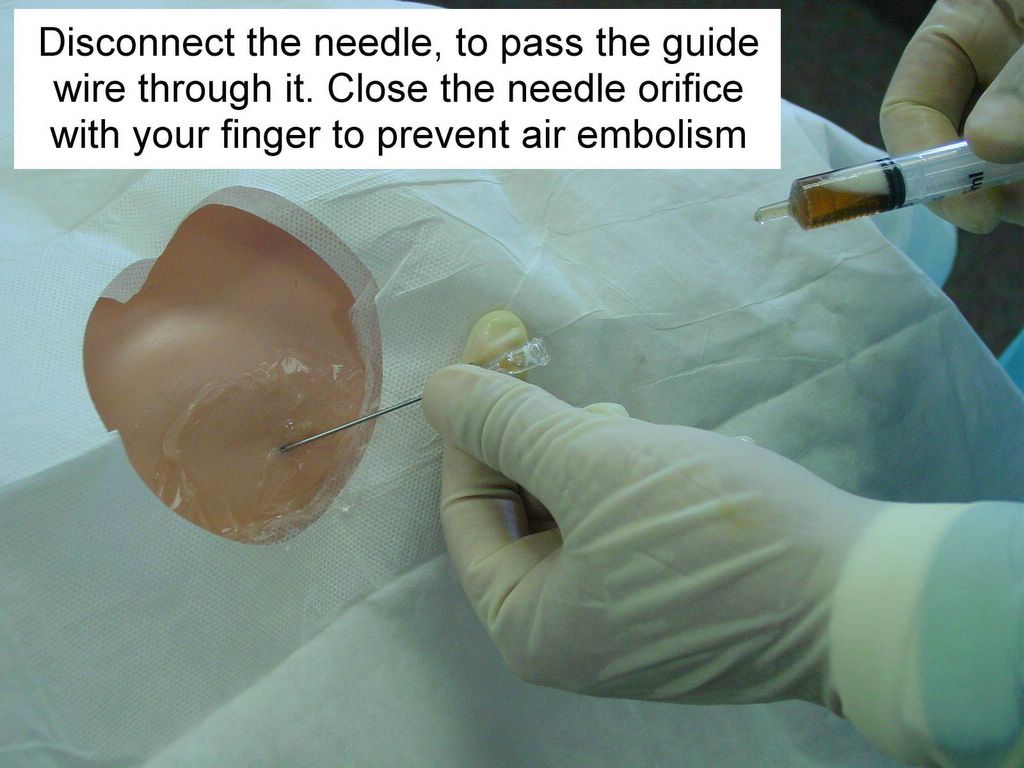
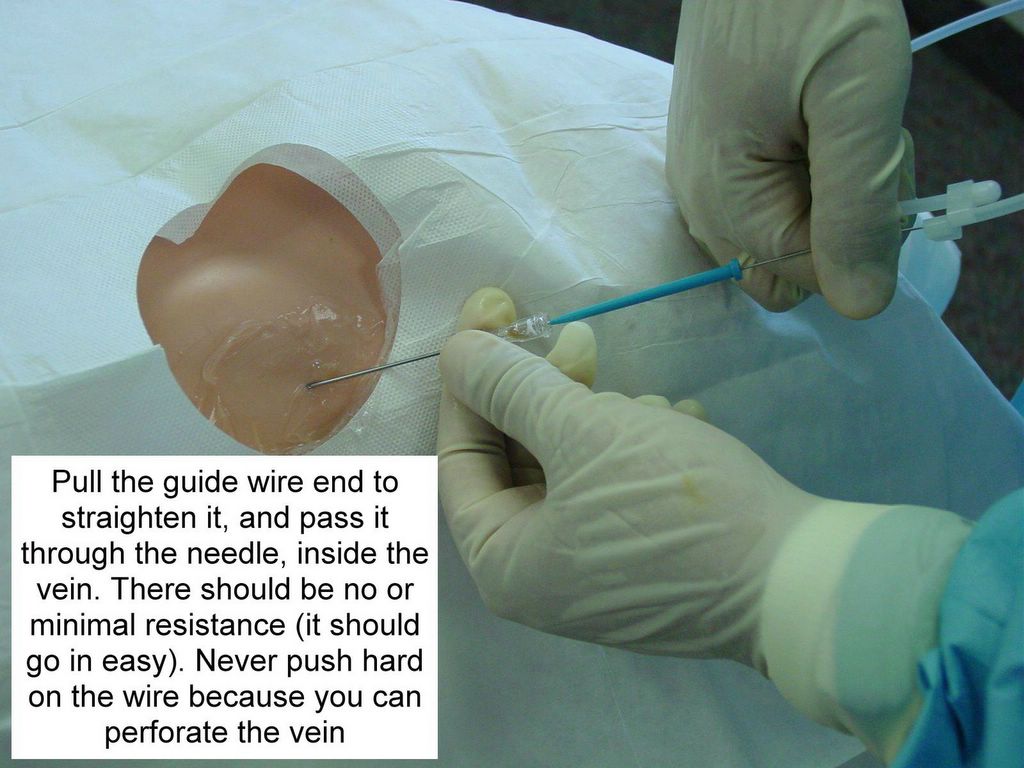
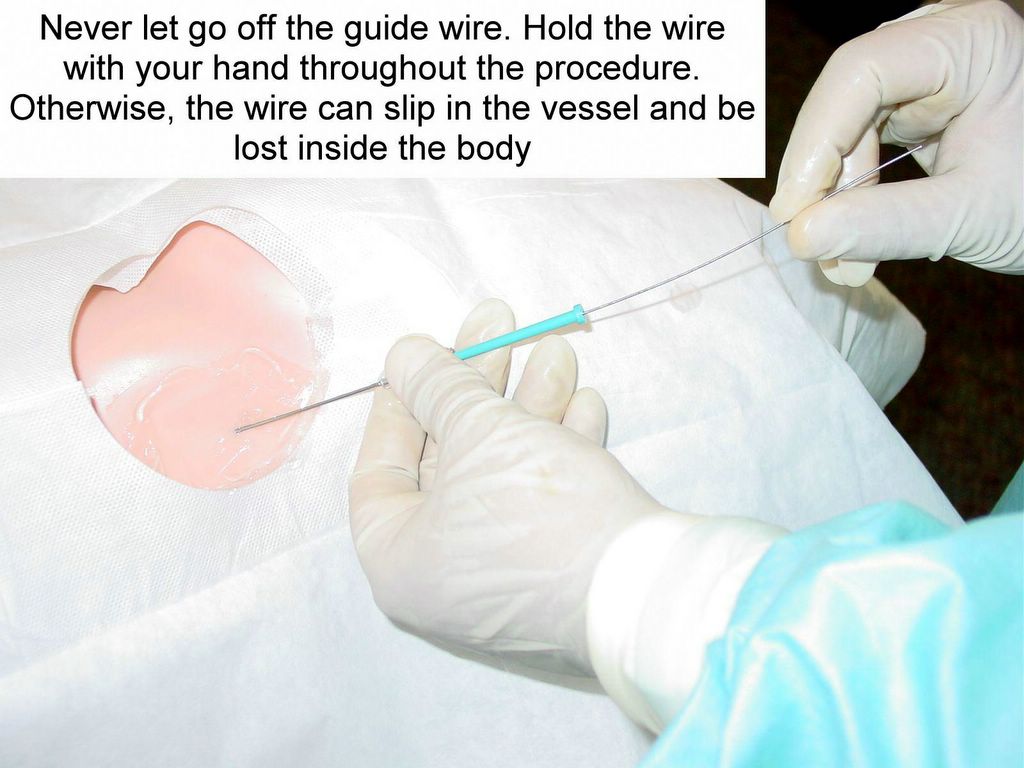
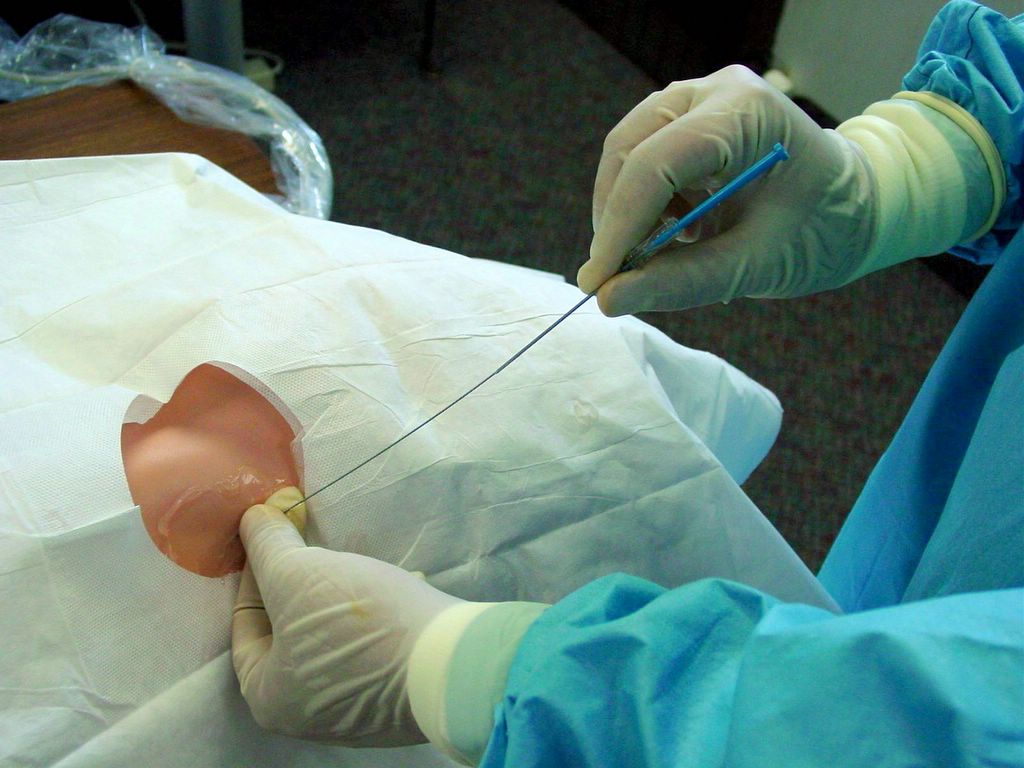
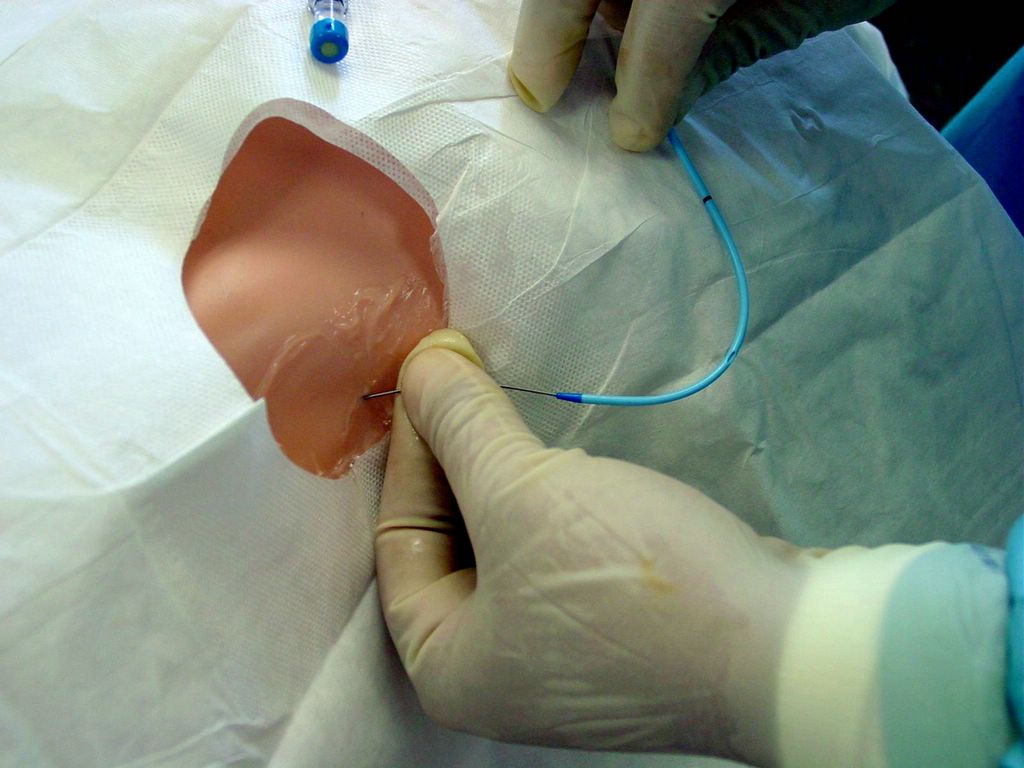
Fig. 42, 43, 44, 45, 46. Thread in the guide wire.


Fig. 47, 48
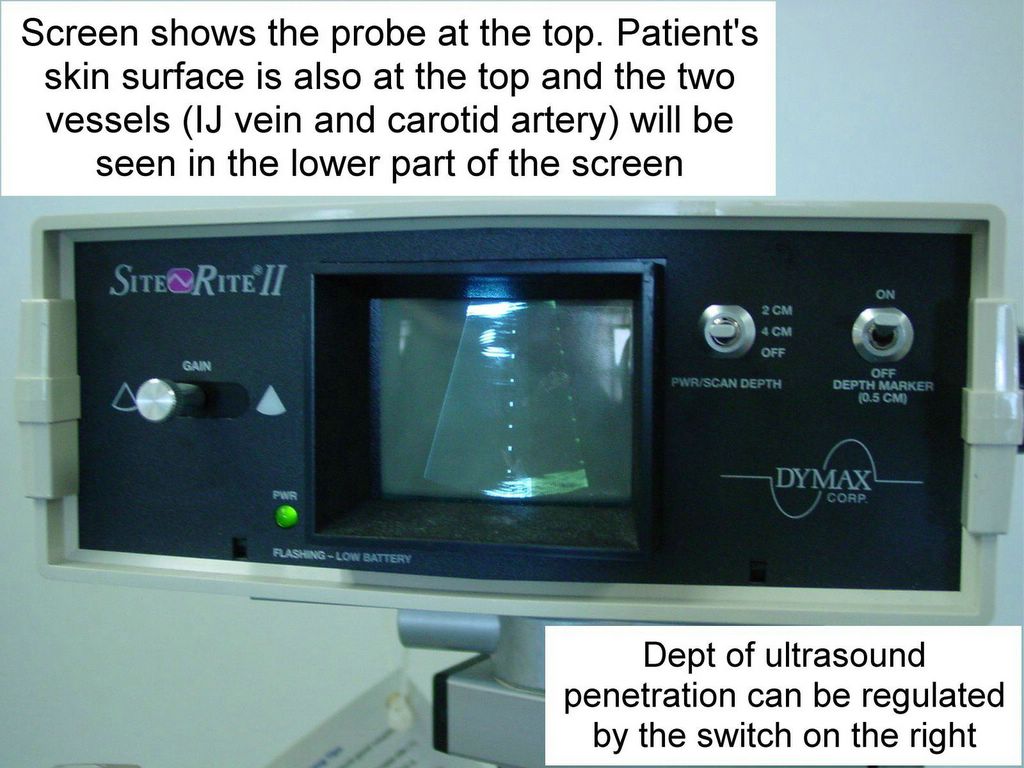

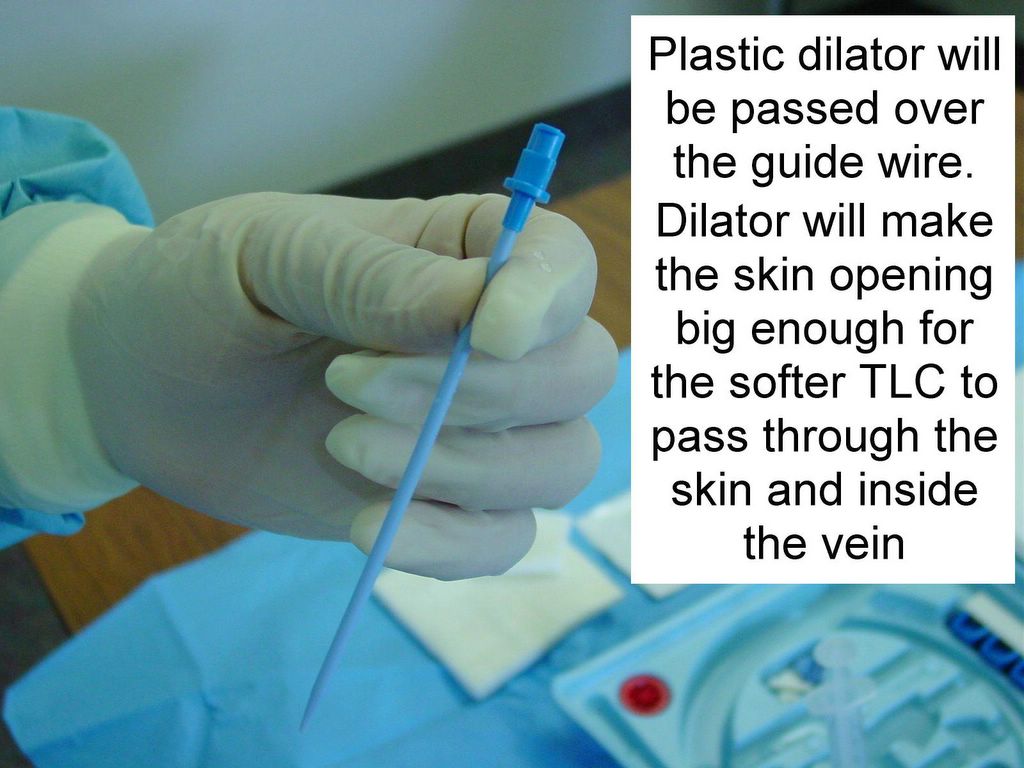
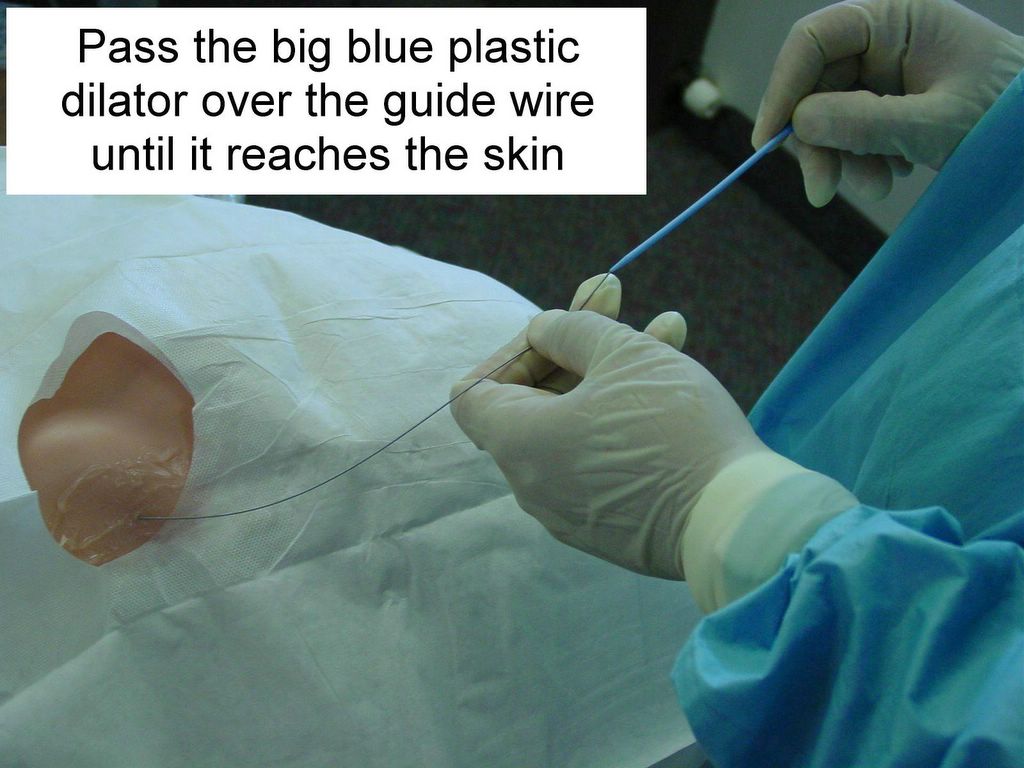
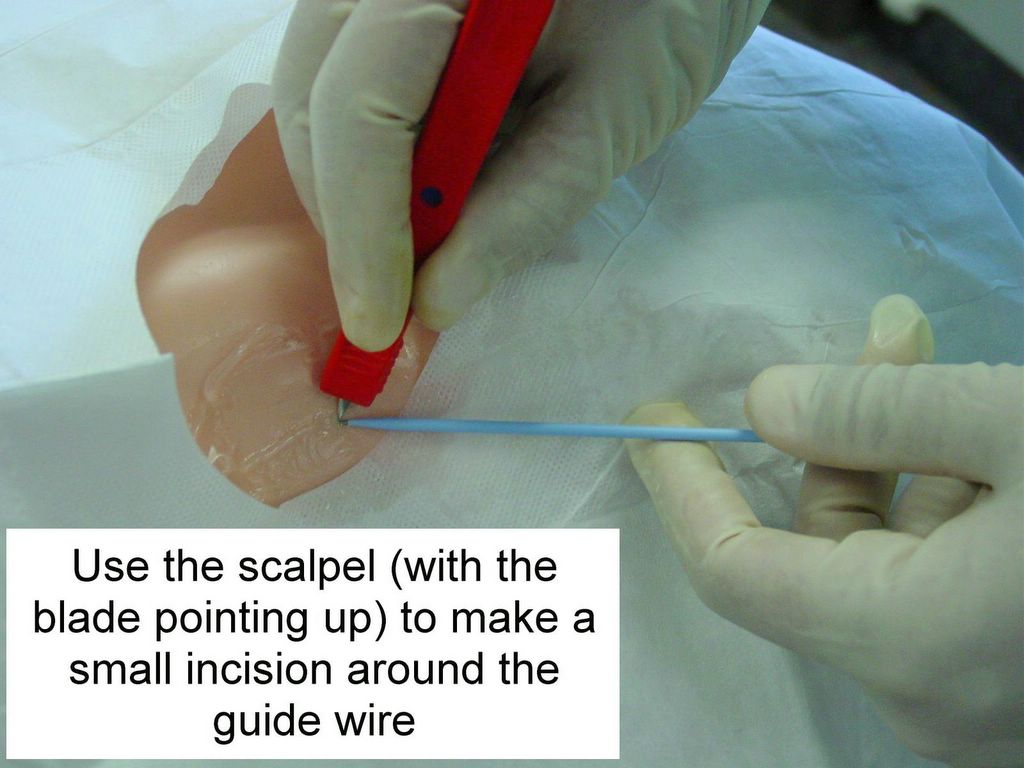
Fig. 49, 50, 51, 52. Pass the dilator over the guide wire.


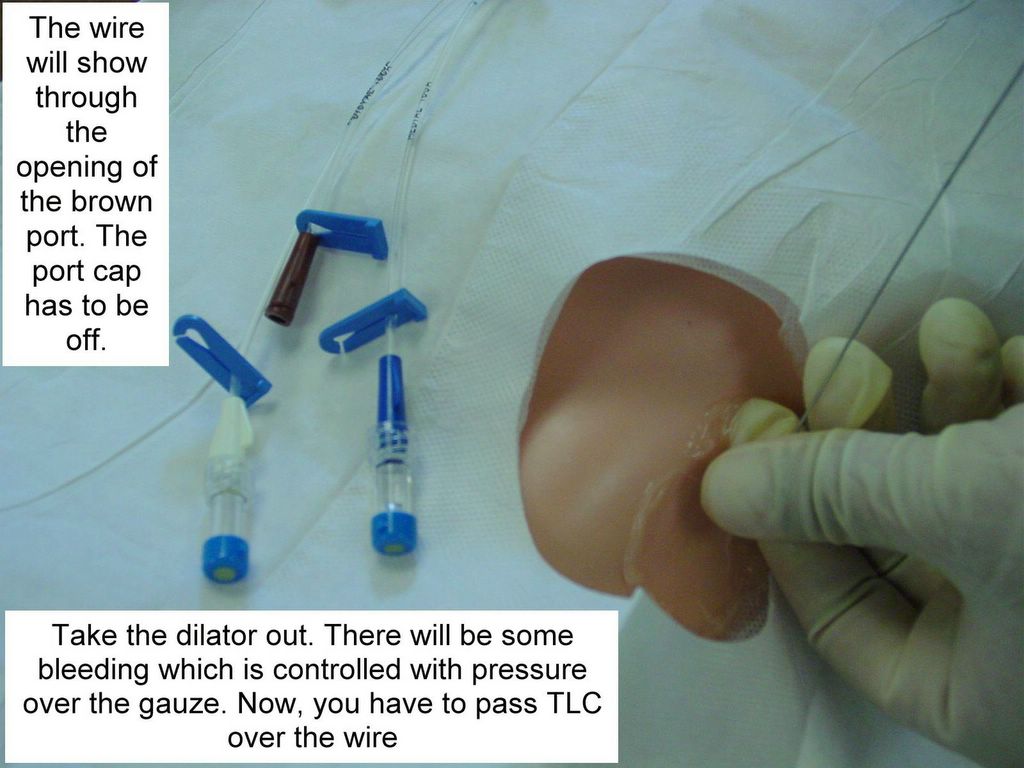
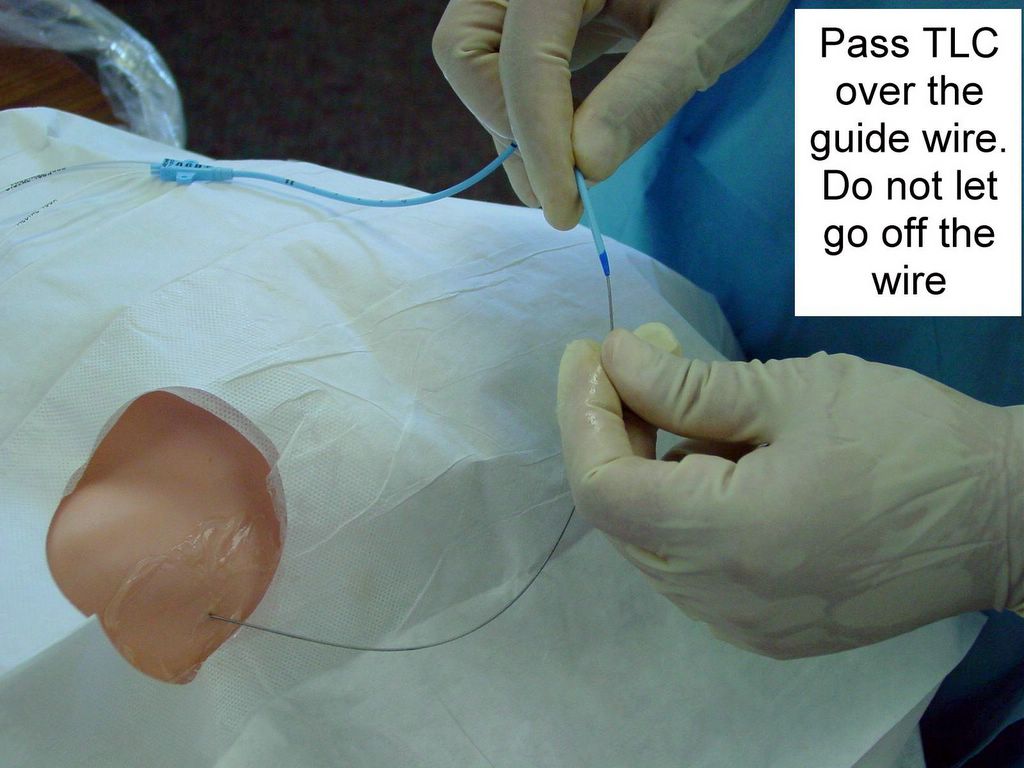
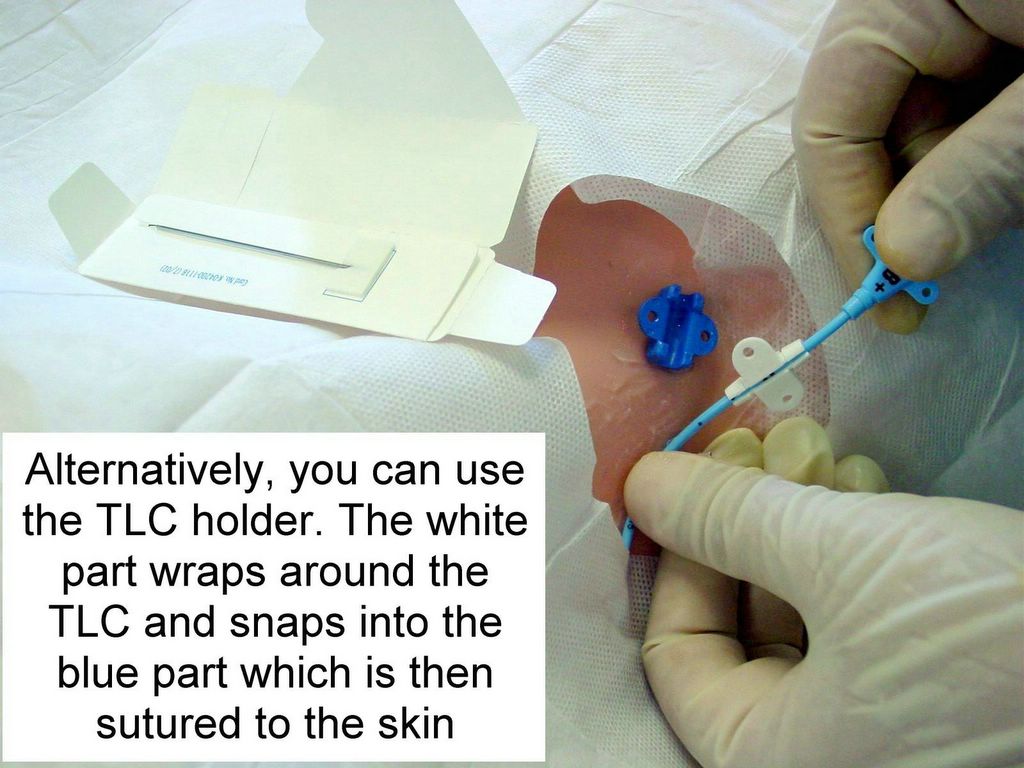
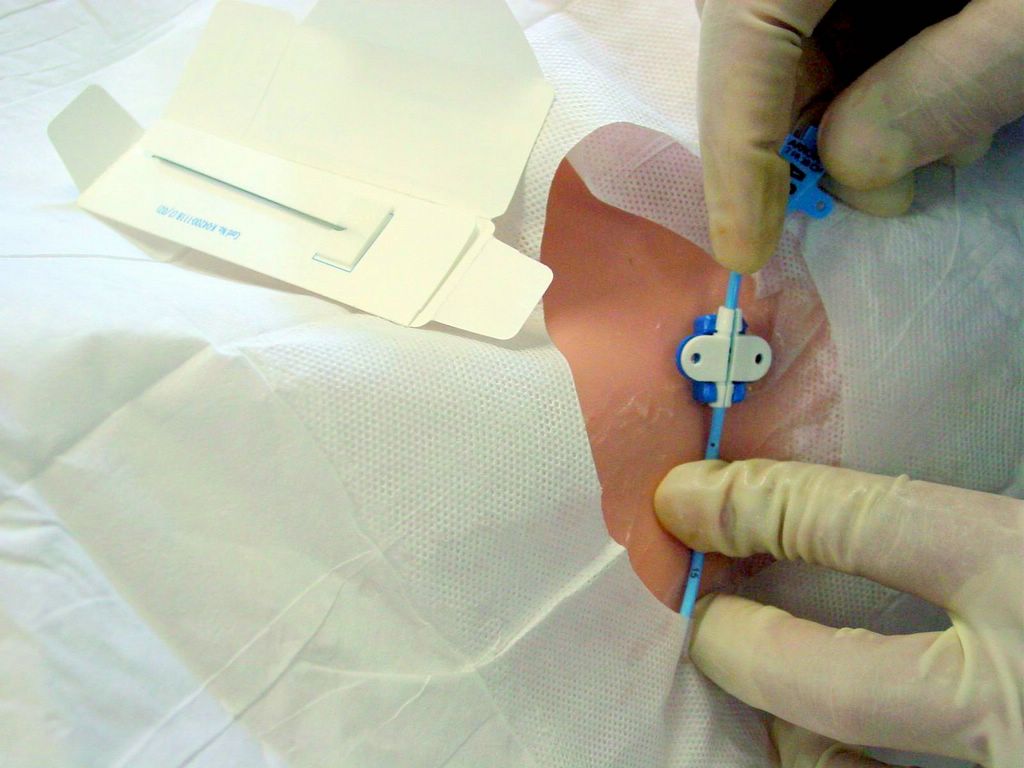
Fig. 53, 54, 55, 56. Pass the TLC over the guide wire.


Fig. 57, 58, 59.


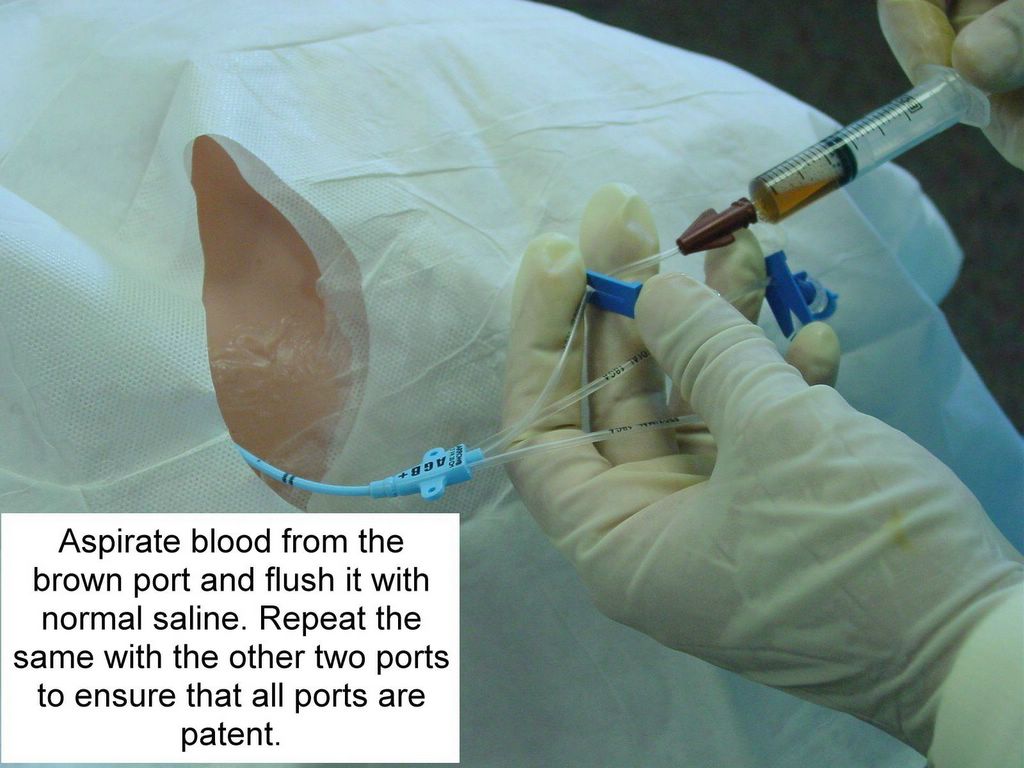
Fig. 60, 61. Flush the TLC to make sure that all 3 ports are patent.


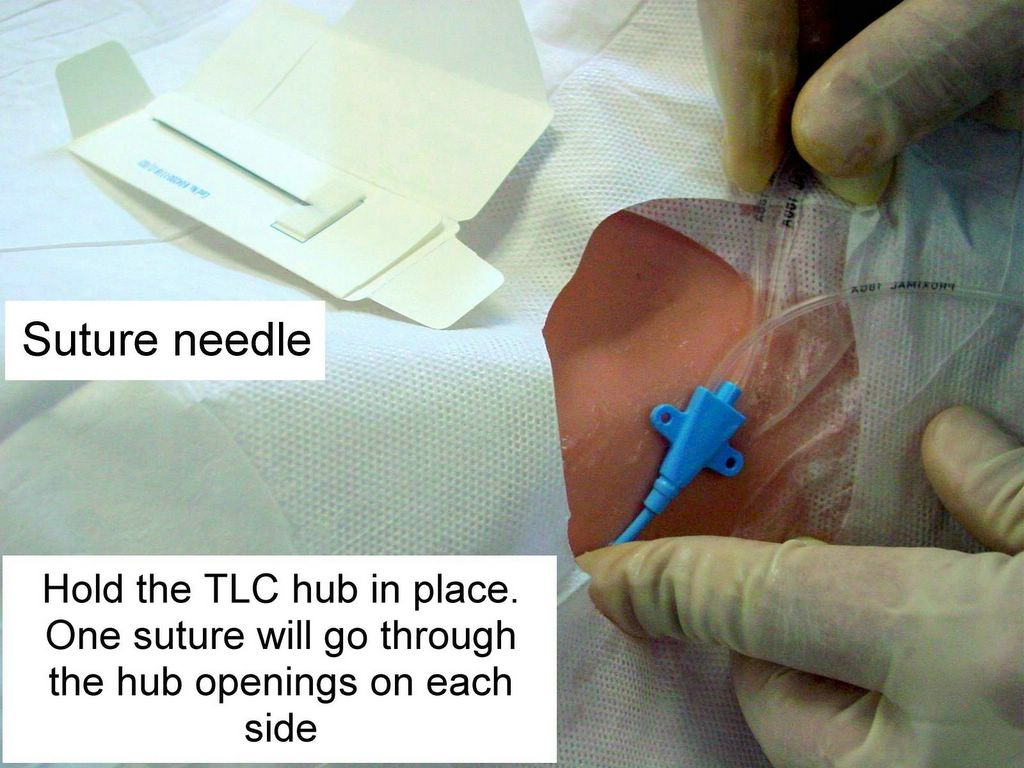
Fig. 62, 63, 64. Suture the TLC in place.

Do not forget to put the needles in the sharp objects collector box. Order a CXR to rule out a pneumothorax and write a procedure note.

Complications

Pneumothroax
Hemothorax
Arrhythmias
Air embolism
Introduction of infection

Write a procedure note which documents the following:

Patient consent
Indications for the procedure
Relevant labs, e.g INR/PTT, platelet count
Procedure technique, sterile prep, anesthetic, amount of fluid obtained, character of fluid, estimated blood loss
Any complications
Tests ordered

References

Central Line Placement (with and without ultrasound guidance). A Chapter in MeisterMed's Procedure Series for PDA. V. Dimov, B. Altaqi, 2/20/2007.
Central Venous Catheterization. NEJM, 2007 (paid subscription required).
Ultrasound Guidance of Central Vein Catheterization - The evidence base of the procedure is discussed in the patient safety report of the Agency for Healthcare Research and Quality (AHRQ).
Ultrasound-Guided Central Venous Cannulation. Society of Cardiovascular Anesthesiologists.
Handheld “Vein Finder” for Faster, More Accurate Injections. Georgia Institute of Technology.
Central Venous Access. eMedicine, July 29, 2005.
VenousAccess.com Slides
Central Venous Catheterization: Concise Definitive Review. Medscape, Critical Care Medicine, 05/16/2007 (free registration required).
Placement of a Femoral Venous Catheter. NEJM, 06/2008.

Disclaimer

The material and/or content on this web site are for informational purposes only. Users of the web site should not act upon any information received from this site without seeking professional consultation. Click here for more information.

Published: 05/30/2005
Updated: 06/25/2008